Loggin in with Okta, oneLogin or PingID
To setup SAML in NSolid see here.
If you are using NSolid for the first time it is important that you observe step 1 - 8. If you are a repeat user you can jump to step 9.
Logging in with Okta
To use the NSolid Console for the first time you must sign into accounts.nodesource.com first to accept the NodeSource Terms and Conditions. As such this user flow suggests starting with accounts.nodesource.com. Once you accepted the terms you can log into the NSolid Console directly using your Okta SAML credentials directly.
- Visit **https://accounts.nodesource.com/sign-in**
- Enter your corporate email address that is associated with your SAML credentials in the ‘EMAIL and SAML Accounts’ field:
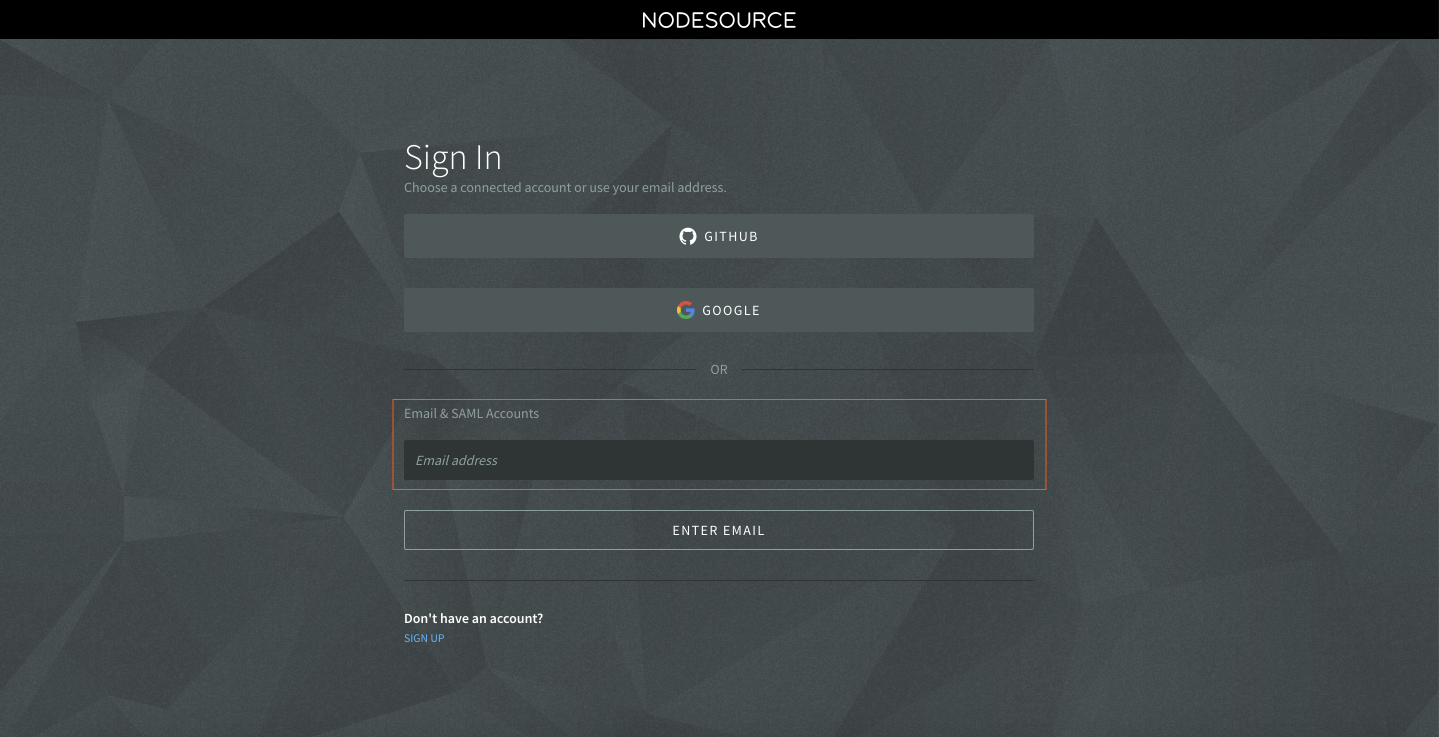
- The system will automatically detect your email address and offer a SAML sign-in if your employer set up Federated Authentication for your NodeSource organization.
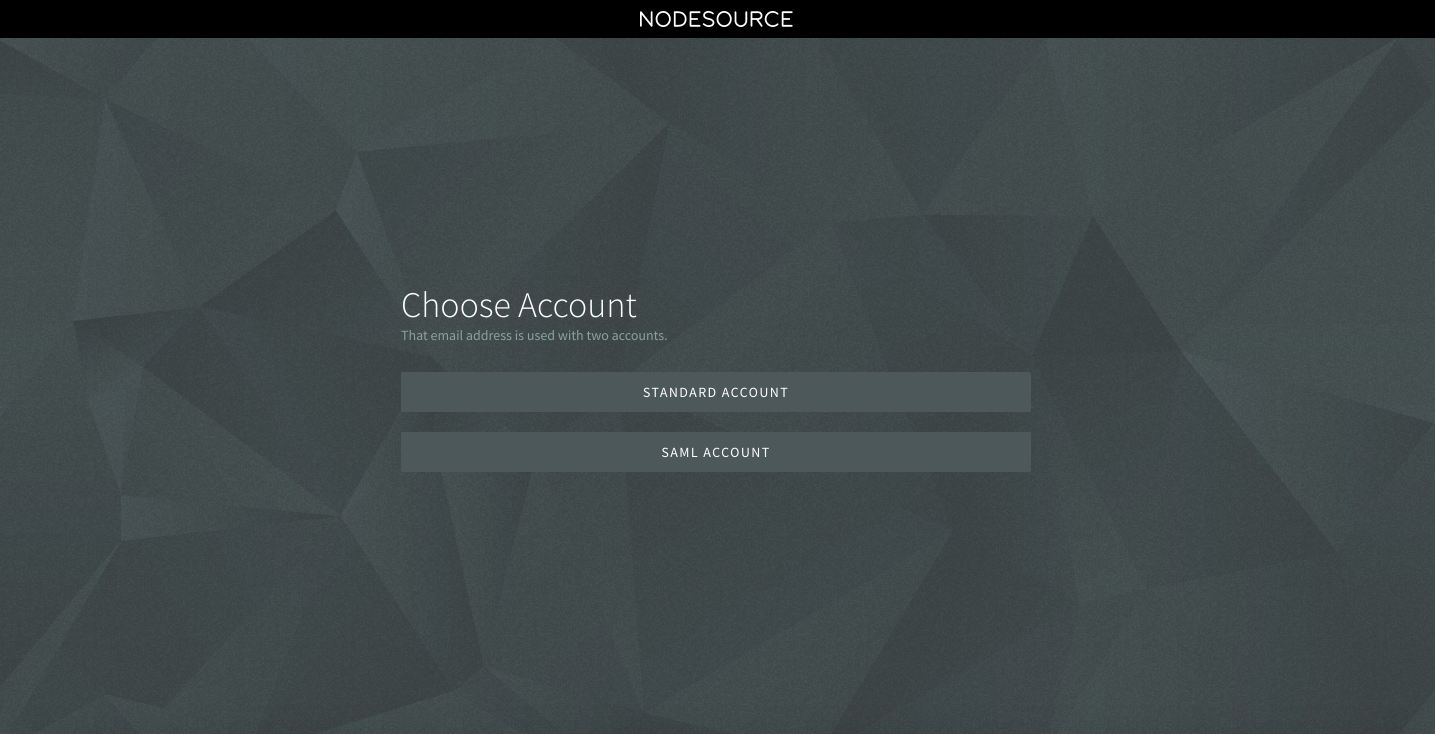
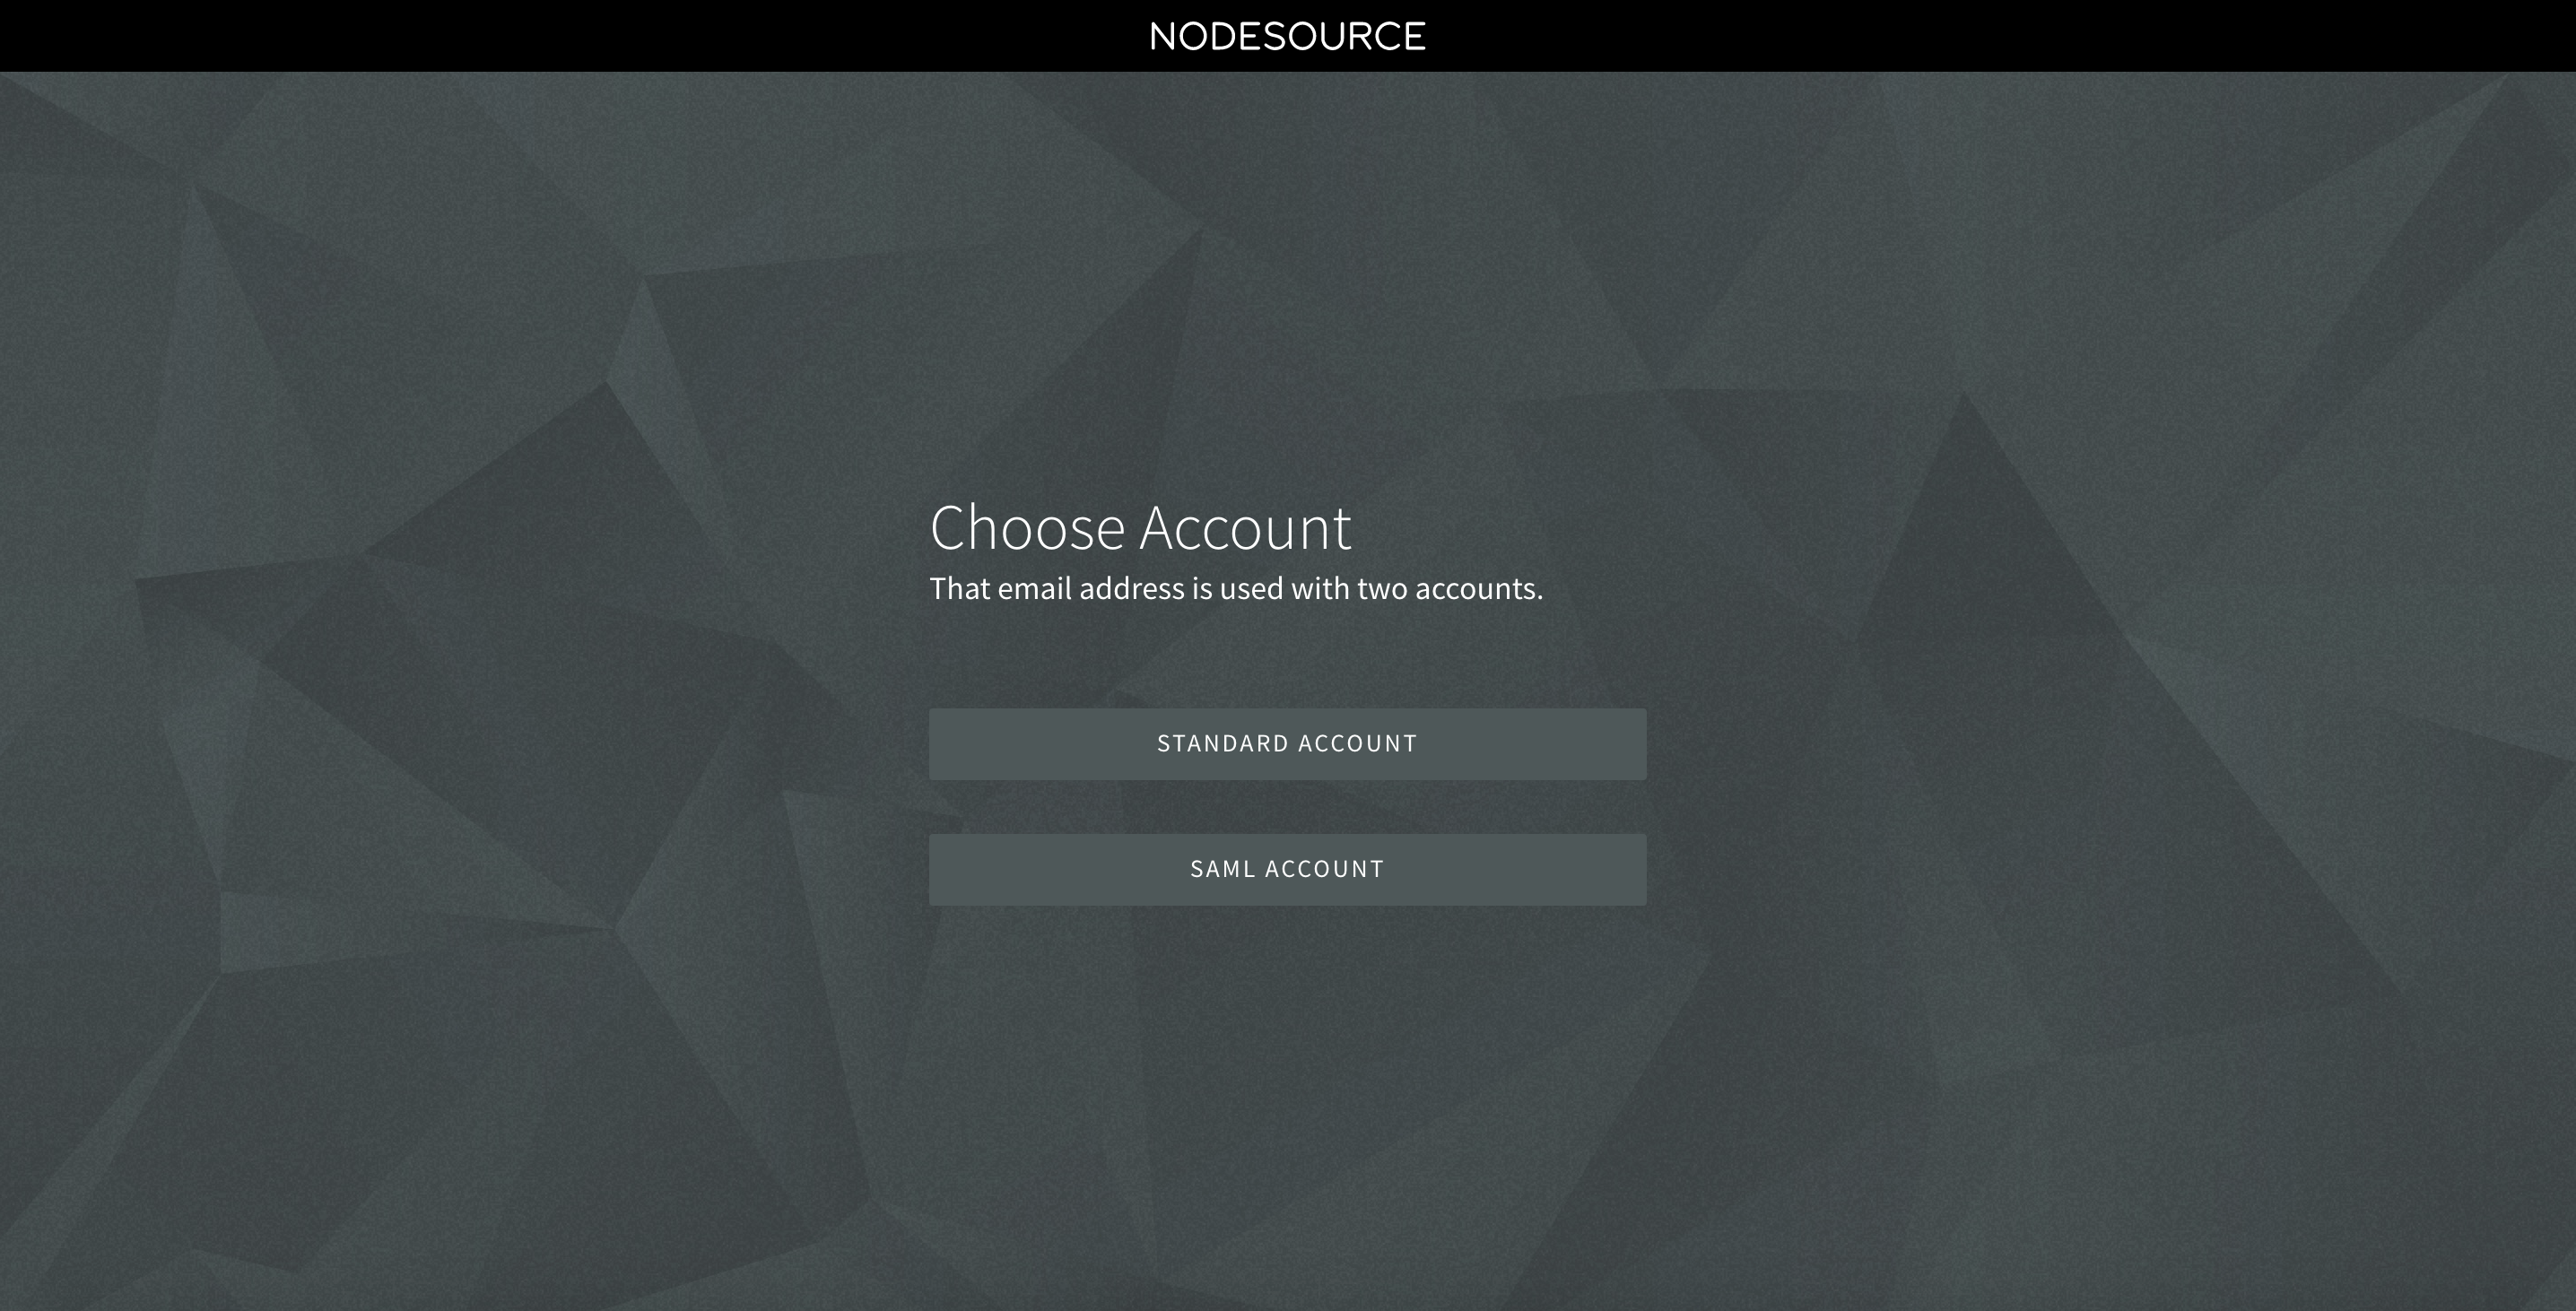
- If you used your email address to set up a standard account and your employer set up Federated Authentication for their NodeSource organization, you will be given the option to select which account you would like to login to. Select the the SAML Account button if you wish to log into your employer’s NodeSource account:
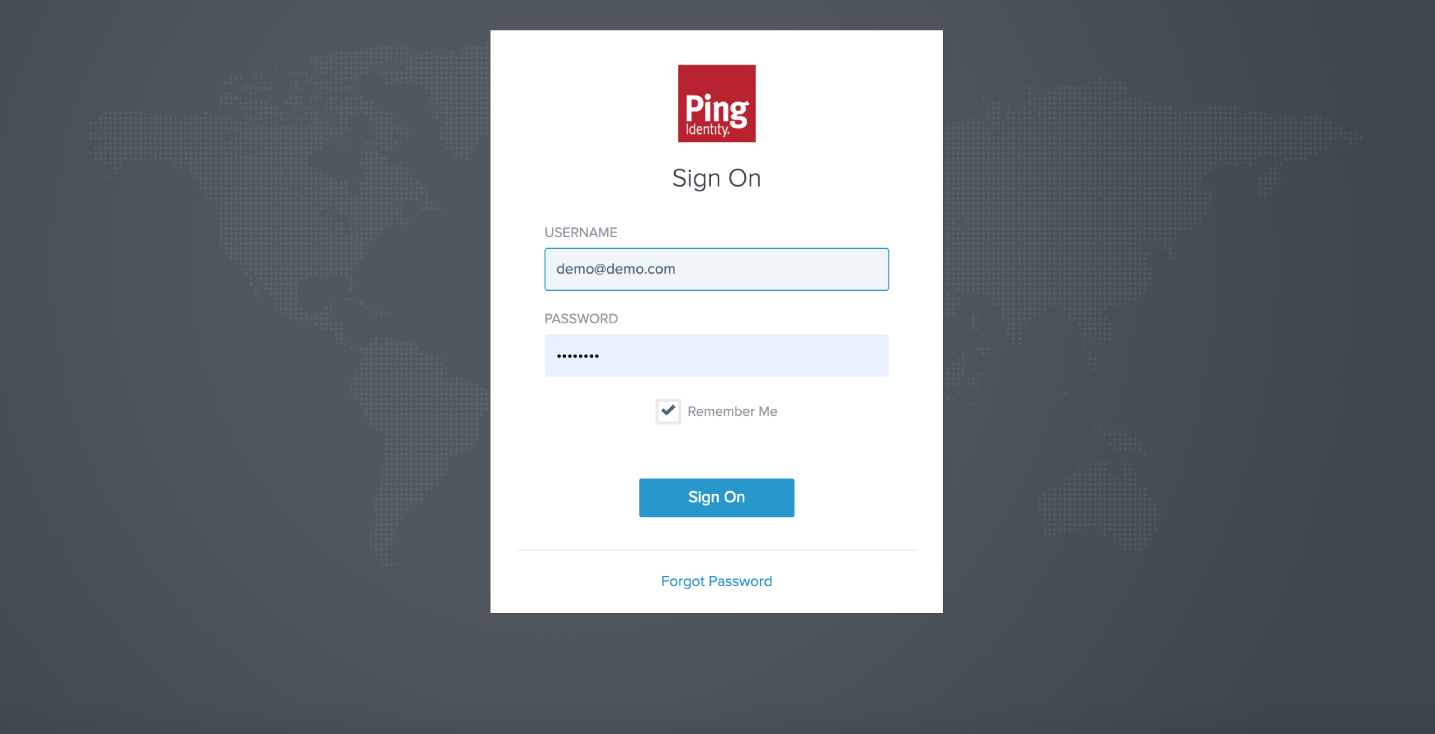
- Once you selected ‘SAML Account’ you will be redirected to the Okta authentication page:
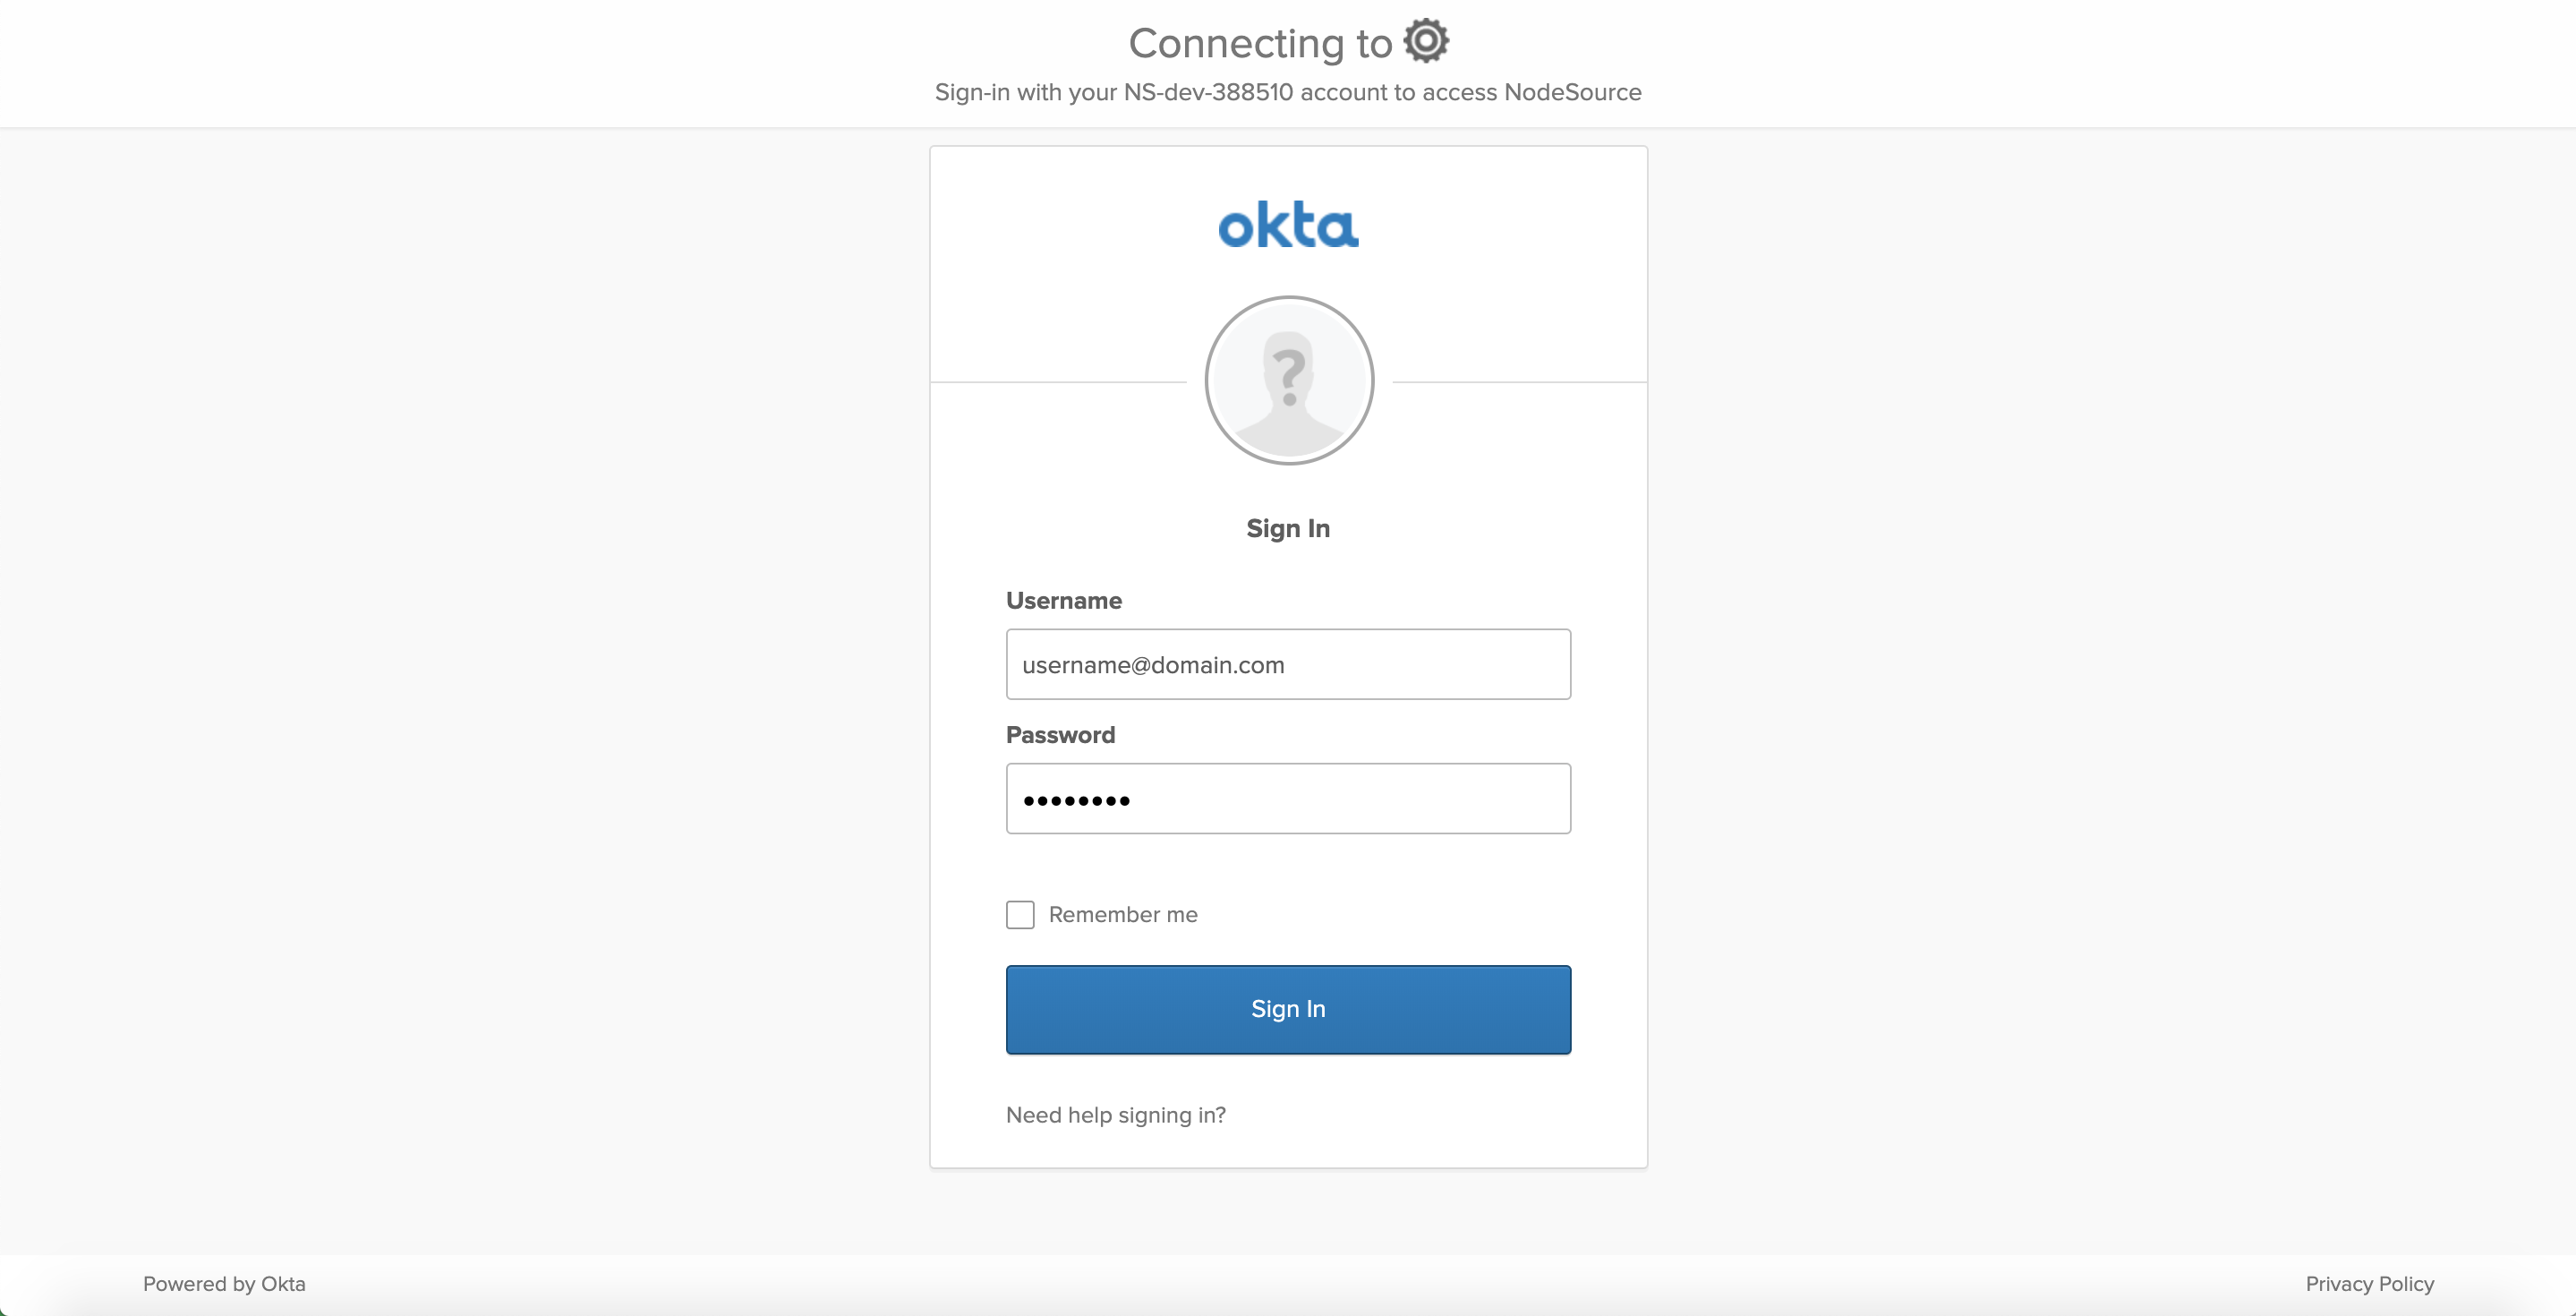
- Use your Okta credentials (provided by your employer) to sign into Okta.
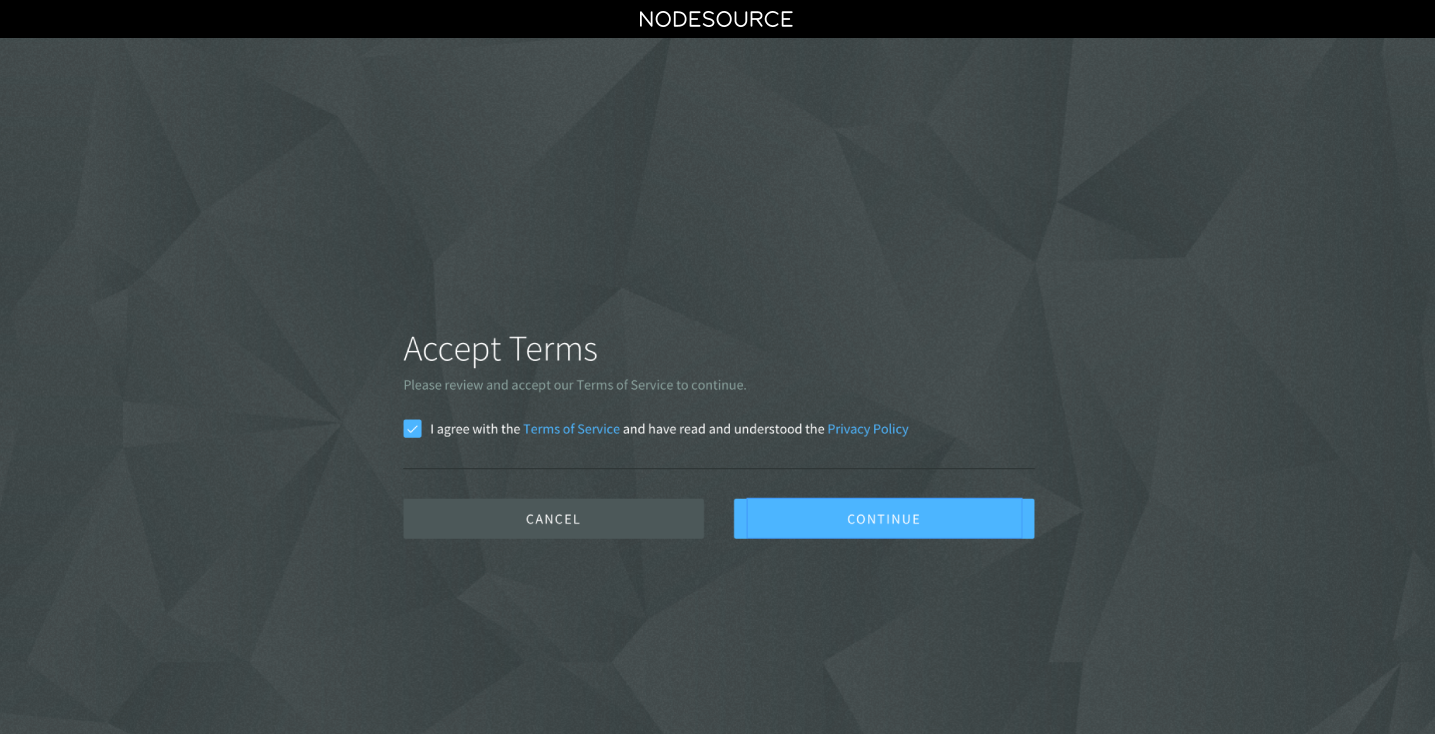
- If this is your first time signing in you will be asked to accept NodeSource’s Terms and Conditions:
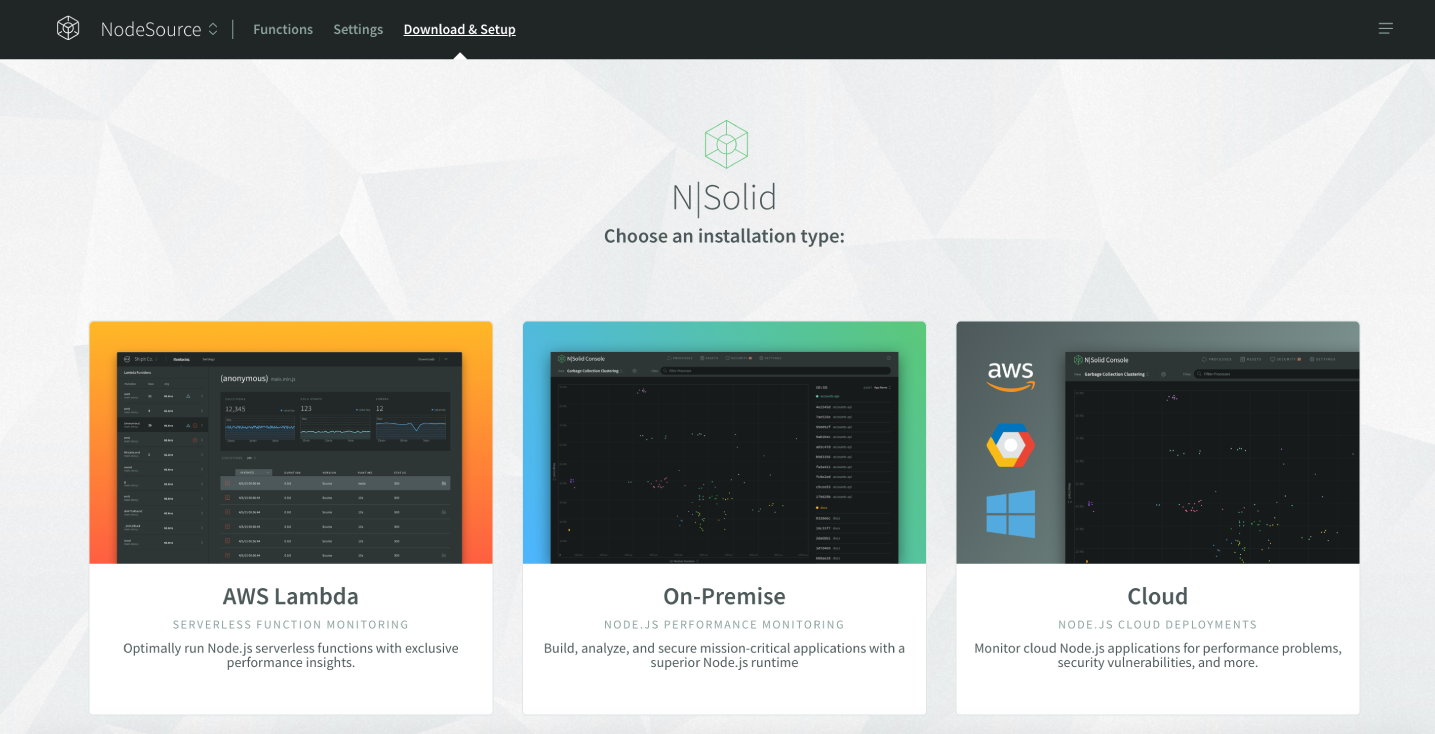
- Once you signed in and if you accepted NodeSource Terms previously you will land on the accounts.nodesource.com download page:
You can now install NSolid (see here), or open the NSolid Console (next step)
If you happen to be a member of multiple NodeSource organizations, please note that you can still select your personal and/or other org accounts from the org-selector in the top left corner, but access to said accounts will be restricted. To regain full access to said accounts, simply log out and access said organizations via their corresponding email address, SAML or SSO login.
-
If you accepted the NodeSource Terms previously you can directly navigate to the NSolid Console. The URL to do so depends on your organization’s chosen method of deployment. Please see the Getting Started Guide for details (here).
-
When logging into the Console for the first time, you must register your console with your SAML details.
-
Enter your corporate email address that is associated with your SAML credentials in the ‘EMAIL and SAML Accounts’ field:
- If you used your email address to set up a standard account and your employer set up Federated Authentication for their NodeSource organization, you will be given the option to select which account you would like to login to. Select the the SAML Account button if you wish to log into your employer’s NodeSource account:
- Once you selected ‘SAML Account’ you will be redirected to the Okta authentication page:
- Use your Okta credentials (provided by your employer) to sign into Okta.
- Once you successfully authenticated, the console is linked to your organization and your team members will be able to use it.
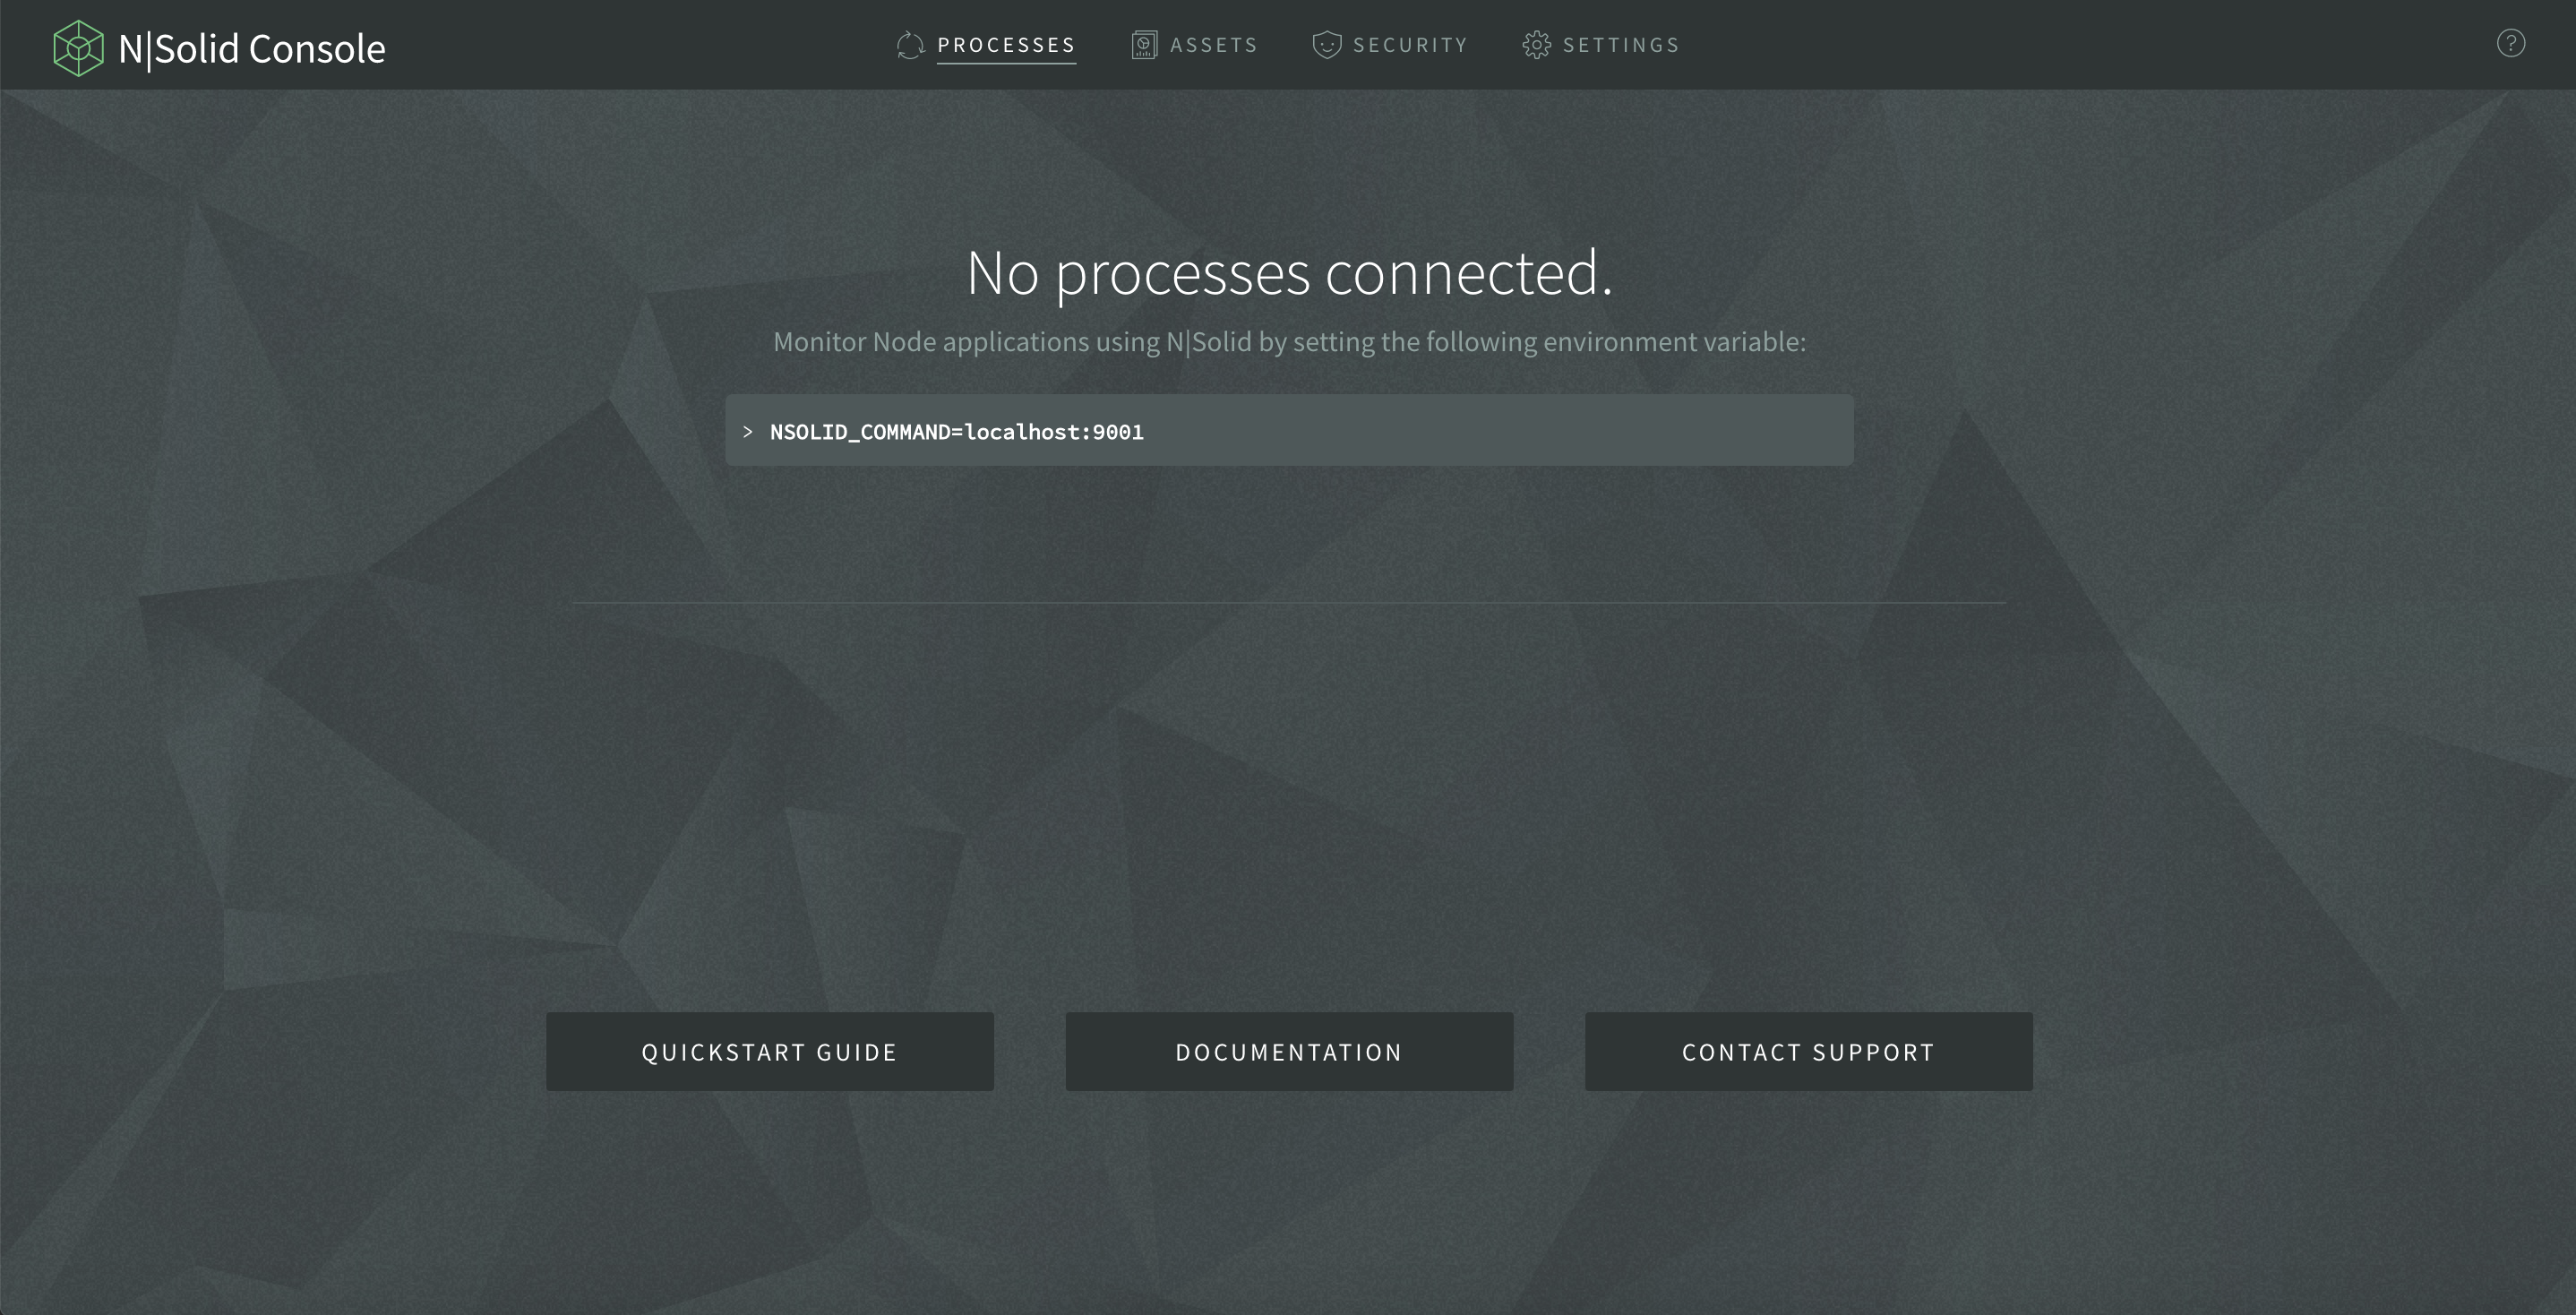
- To connect a process please consult the Quick Start guide here.
- To invite team-members (see here).
Logging in with PingID via PingOne Desktop:
There are two ways to use PingID to authenticate into NodeSource’s Accounts and NSolid Console. This covers the use of the PingOne Desktop Application view. You can also use accounts.nodesource.com to sign in directly with your PingID credentials (see here).
If you are using NSolid for the first time it is important that you observe step 1 - 9. If you are a repeat user you can jump to step 10.
- Visit your PingID portal via the PingID URL you were provided with by your employer. It will look something like this: https://desktop.pingone.com/cd-xxxxxxx.[yourPingIDorgname
- Sign into the PingID platform with the username and password you were provided with by your organization
- Upon Sign In you will be redirected to the applications page.
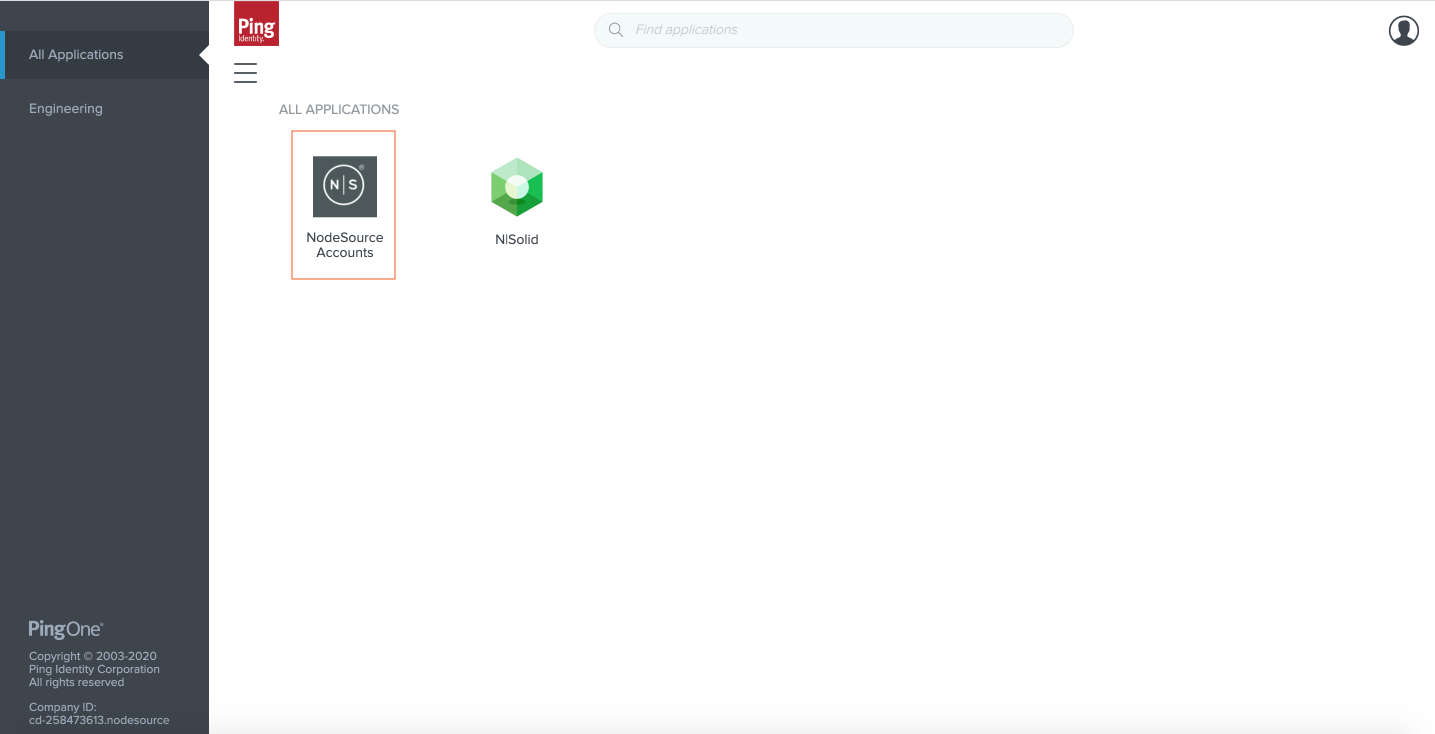
- There you should see an icon for:
- NodeSource Accounts: Our authentication and user management platform and
- NSolid Console: The runtime-powered observability tool to monitor your application’s performance and security posture.
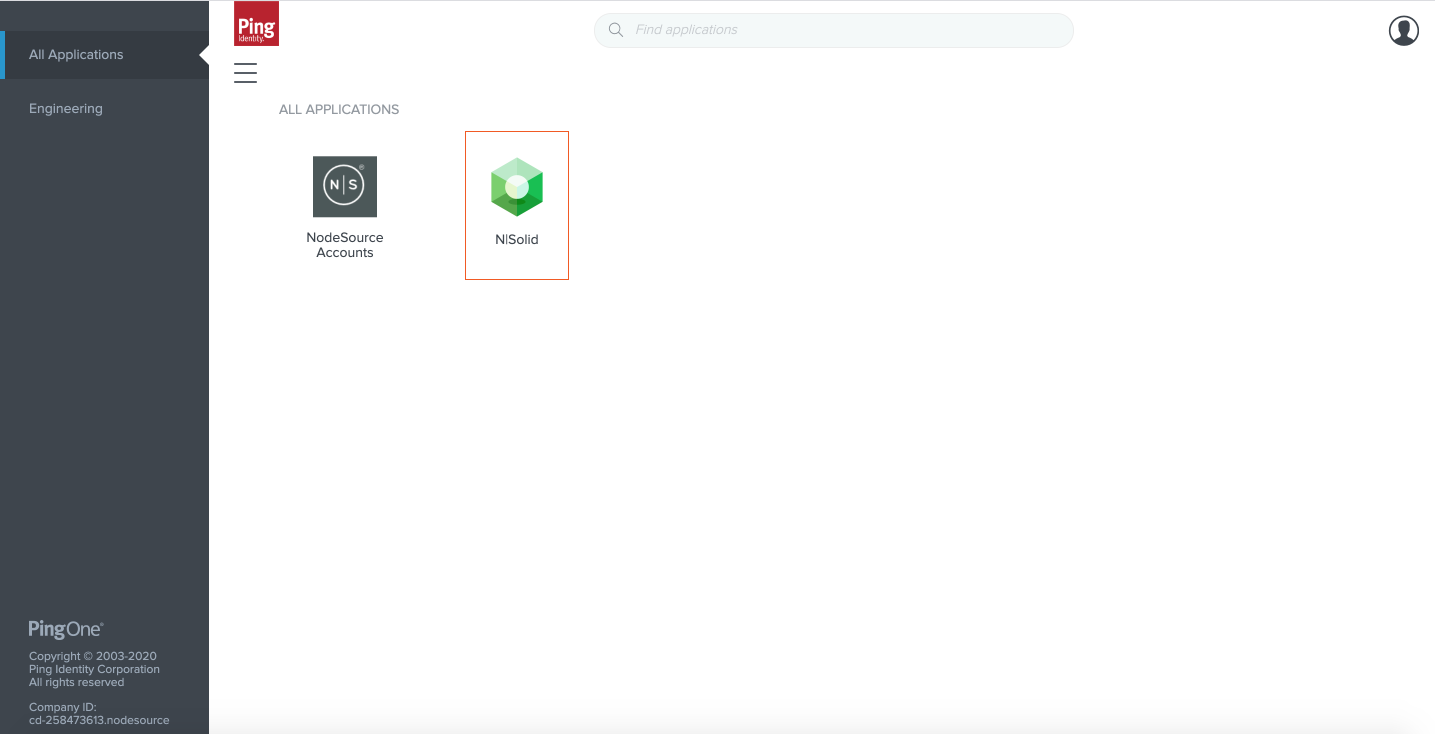
- Please select NodeSource Accounts first
- You will be redirected to **https://accounts.nodesource.com/sign-in**
- If this is your first time signing in you will be asked to accept NodeSource’s Terms and Conditions:
- Once you signed in and if you accepted NodeSource Terms previously you will land on the accounts.nodesource.com download page:
- You can now install NSolid (see here), or open the NSolid Console (next step)
- Once you installed NSolid you can open the NSolid Console via the PingOne Desktop Application view:
- Once you successfully authenticated, the console is linked to your organization and your team members will be able to use it.
- To connect a process please consult the Quick Start guide here.
- To invite team-members (see here).
Logging in with PingID directly:
If you are using NSolid for the first time it is important that you observe step 1 - 8. If you are a repeat user you can jump to step 9.
To use the NSolid Console for the first time you must sign into accounts.nodesource.com first to accept the NodeSource Terms and Conditions. As such this user flow suggests starting with accounts.nodesource.com. Once you accepted the terms you can log into the NSolid Console directly using your PingID SAML credentials directly.
- Visit **https://accounts.nodesource.com/sign-in**
- Enter your corporate email address that is associated with your SAML credentials in the ‘EMAIL and SAML Accounts’ field:
- The system will automatically detect your email address and offer a SAML sign-in if your employer set up Federated Authentication for your NodeSource organization.
- If you used your email address to set up a standard account and your employer set up Federated Authentication for their NodeSource organization, you will be given the option to select which account you would like to login to. Select the the SAML Account button if you wish to log into your employer’s NodeSource account:
- Once you selected ‘SAML Account’ you will be redirected to the PingID authentication page:
- Use your PingID credentials (provided by your employer) to sign into PingID.
- If this is your first time signing in you will be asked to accept NodeSource’s Terms and Conditions:
- Once you signed in and if you accepted NodeSource Terms previously you will land on the accounts.nodesource.com download page:
You can now install NSolid (see here), or open the NSolid Console (next step)
If you happen to be a member of multiple NodeSource organizations, please note that you can still select your personal and/or other org accounts from the org-selector in the top left corner, but access to said accounts will be restricted. To regain full access to said accounts, simply log out and access said organizations via their corresponding email address, SAML or SSO login.
- If you accepted the NodeSource Terms previously you can directly navigate to the NSolid Console. The URL to do so depends on your organization’s chosen method of deployment. Please see the Getting Started Guide for details (here).
- When logging into the Console for the first time, you must register your console with your SAML details.
- Enter your corporate email address that is associated with your SAML credentials in the ‘EMAIL and SAML Accounts’ field:
- If you used your email address to set up a standard account and your employer set up Federated Authentication for their NodeSource organization, you will be given the option to select which account you would like to login to. Select the the SAML Account button if you wish to log into your employer’s NodeSource account:
- Once you selected ‘SAML Account’ you will be redirected to the PingID authentication page:
- Use your PingID credentials (provided by your employer) to sign into PingID.
- Once you successfully authenticated, the console is linked to your organization and your team members will be able to use it.
- To connect a process please consult the Quick Start guide here.
- To invite team-members (see here).
Logging in with oneLogin:
If you are using NSolid for the first time it is important that you observe step 1 - 8. If you are a repeat user you can jump to step 9.
To use the NSolid Console for the first time you must sign into accounts.nodesource.com first to accept the NodeSource Terms and Conditions. As such this user flow suggests starting with accounts.nodesource.com. Once you accepted the terms you can log into the NSolid Console directly using your oneLogin SAML credentials directly.
-
Visit **https://accounts.nodesource.com/sign-in**
-
Enter your corporate email address that is associated with your SAML credentials in the ‘EMAIL and SAML Accounts’ field:
- The system will automatically detect your email address and offer a SAML sign-in if your employer set up Federated Authentication for your NodeSource organization.
- If you used your email address to set up a standard account and your employer set up Federated Authentication for their NodeSource organization, you will be given the option to select which account you would like to login to. Select the the SAML Account button if you wish to log into your employer’s NodeSource account:
- Once you selected ‘SAML Account’ you will be redirected to the oneLogin authentication page:
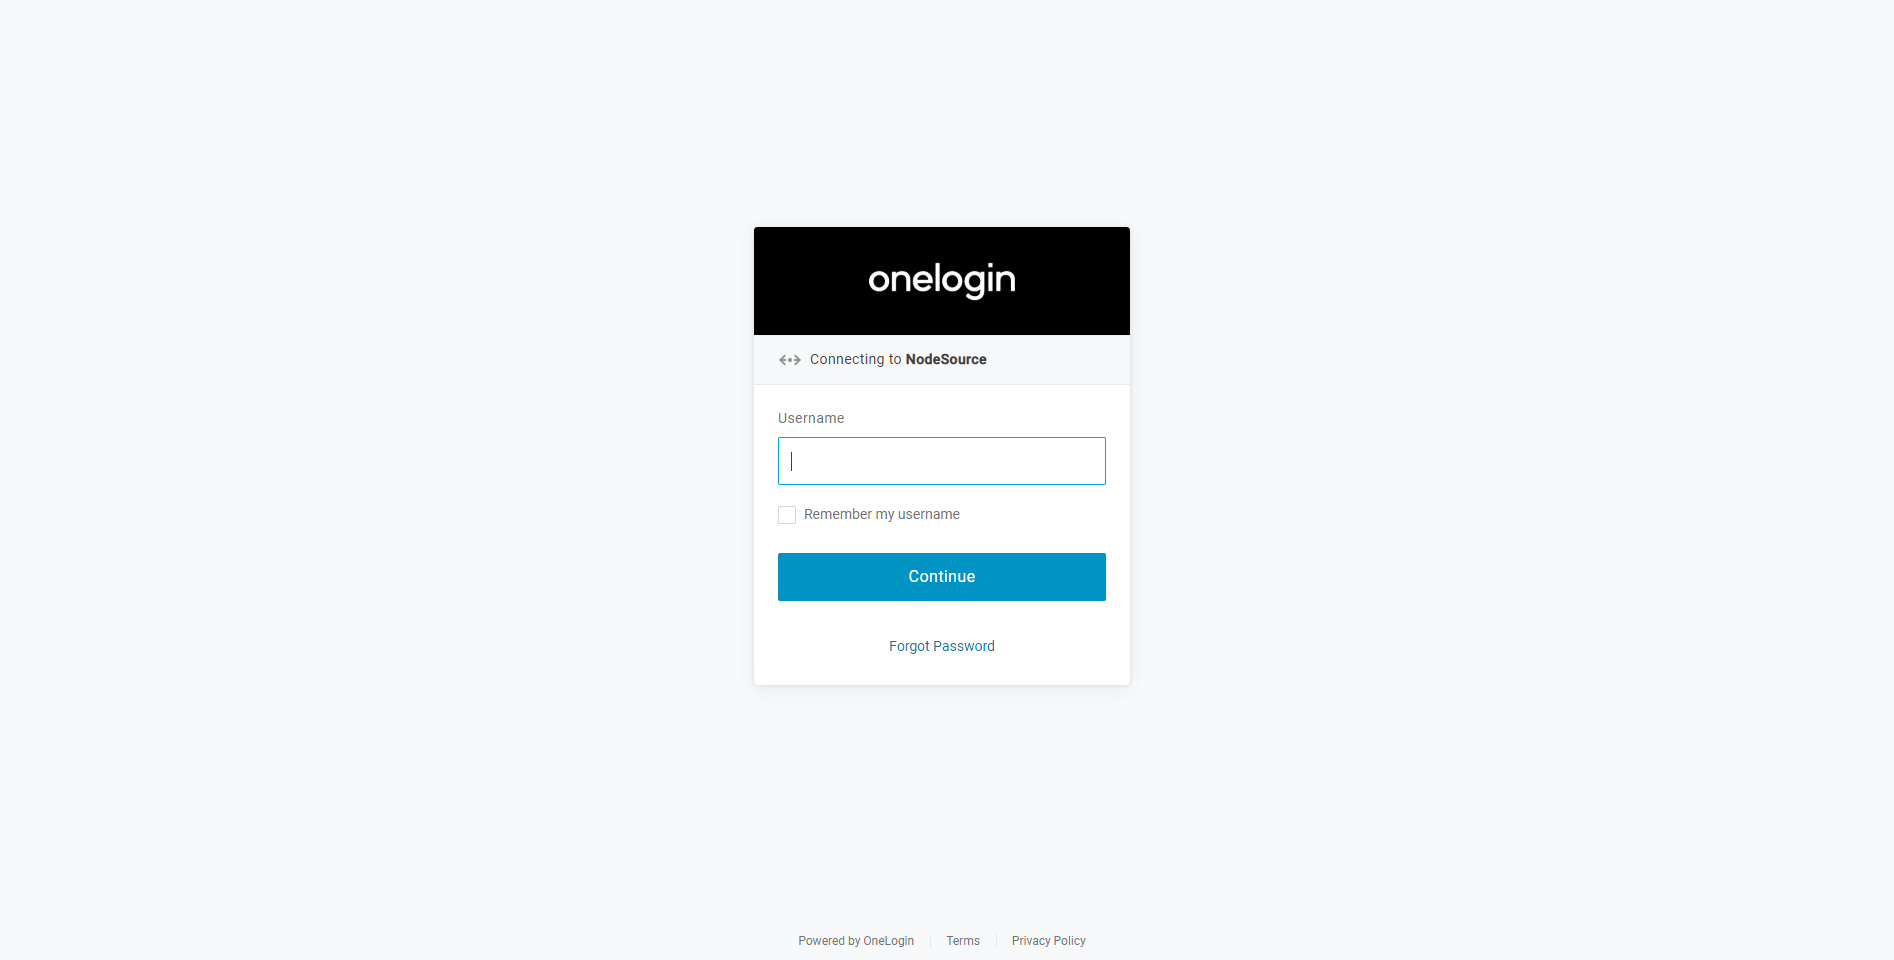
- Use your oneLogin credentials (provided by your employer) to sign into oneLogin.
- If this is our first time signing in you will be asked to accept NodeSource’s Terms and Conditions:
- Once you signed in and if you accepted NodeSource Terms previously you will land on the accounts.nodesource.com download page:
You can now install NSolid (see here), or open the NSolid Console.
If you happen to be a member of multiple NodeSource organizations, please note that you can still select your personal and/or other org accounts from the org-selector in the top left corner, but access to said accounts will be restricted. To regain full access to said accounts, simply log out and access said organizations via their corresponding email address, SAML or SSO login.
-
If you accepted the NodeSource Terms previously you can directly navigate to the NSolid Console. The URL to do so depends on your organization’s chosen method of deployment. Please see the Getting Started Guide for details (here).
-
When logging into the Console for the first time, you must register your console with your SAML details.
-
Enter your corporate email address that is associated with your SAML credentials in the ‘EMAIL and SAML Accounts’ field:
- If you used your email address to set up a standard account and your employer set up Federated Authentication for their NodeSource organization, you will be given the option to select which account you would like to login to. Select the the SAML Account button if you wish to log into your employer’s NodeSource account:
- Once you selected ‘SAML Account’ you will be redirected to the oneLogin authentication page:
-
Use your oneLogin credentials (provided by your employer) to sign into oneLogin.
-
Once you authenticated successfully a browser window containing the NSolid Console will open. To connect a process please consult the Quick Start guide here.
-
Once you successfully authenticated, the console is linked to your organization and your team members will be able to use it.
- To connect a process please consult the Quick Start guide here.
- To invite team-members (see here).
