Configuration
There are multiple ways to send configuration to the N|Solid Runtime:
- Environment-based
- File-based config
- JavaScript runtime configuration
Each of these three options can be used in the same way with the same outcome and it is entirely up to your requirements for implementation.
The default configuration of N|Solid will only start up the agent partially, the Agent thread will start, but it will not perform any automated checks or attempt to send any observability data anywhere without an endpoing configured.
To connect to an N|Solid Console Server, the minimum configuration for starting the N|Solid Agent with observability in place is the NSOLID_SAAS or NSOLID_GRPC or NSOLID_COMMAND address for either your N|Solid SaaS Server instance, or your on-premise N|Solid Console Server. This will enable it to handshake and successfully complete the connection and the N|Solid Console Server will complete the networking setup configuration.
NSOLID_GRPC is supported starting with N|Solid 6.1.0 for gRPC connections to the N|Solid Console Server. Earlier versions of N|Solid do not support this configuration. You can use NSOLID_GRPC instead of NSOLID_COMMAND to connect to the N|Solid Console Server, leveraging the gRPC protocol instead of the legacy ZeroMQ protocol.
Running with the Agent Disabled
If no configuration options are set for any of NSOLID_SAAS, NSOLID_GRPC, NSOLID_COMMAND, NSOLID_STATSD, or NSOLID_OLTP defined to instruct it where to send data, the agent is created but most functionality is disabled and the runtime will behave just like unmodified Node.js.
When running in this mode, the N|Solid JavaScript API will still be active, including the nsolid.start function that can be used to configure and start the N|Solid Agent's communication channels.
Connecting to N|Solid Pro SAAS
The simplest way to start working with Observability data for your application is to use N|Solid SAAS. In this setup we start and operate a N|Solid Console Server in the cloud just for your systems and provide a connection string to configure the N|Solid Runtime to connect and authenticate to your dedicated server.
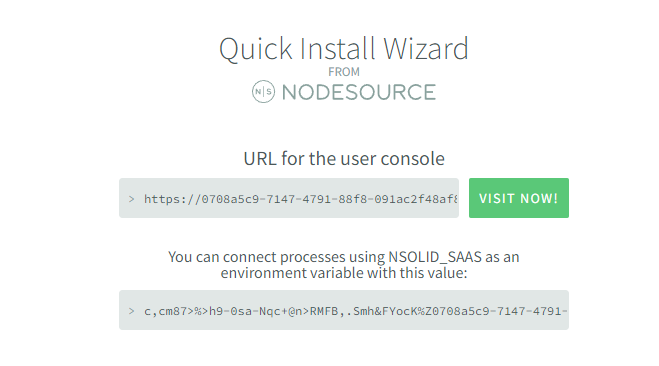
To find your NSOLID_SAAS connection screen, log into NodeSource Accounts and copy the connection string provided. To visit your N|Solid Console Server, click the Visit Now link.
- Environment
- package.json
- JavaScript API
Set the NSOLID_SAAS connection string as an environment variable however you prefer to define your environment:
$ NSOLID_SAAS='your-saas-connection-string...' nsolid index.js
Configuration can also be defined inside your package.json file:
{
  "name": "example",
  "version": "0.0.0",
  "description": "N|Solid Configuration Example",
  "main": "index.js",
  "nsolid": {
    "saas": "... your copied NSOLID_SAAS connection string ..."
  },
  "dependencies": {
    ...
  }
}
For dynamic configurations with runtime logic, the N|Solid Agent can be started directly within your application:
nsolid.start({
  appname: 'example',
  appVersion: '0.0.0',
  saas: '... your copied NSOLID_SAAS connection string...'
})
Any of these three techniques should cause your process to connect and be found in the N|Solid Pro Console.
Connecting to an on-premise N|Solid Console Server
To connect to a self-operated N|Solid Console Server you must specify the NSOLID_COMMAND address where it listens for incoming agent connections. The N|Solid Console Server currently connects to the N|Solid Runtime on three different network ports in order to prioritize commands and data over bulk asset contents. Only the NSOLID_COMMAND must be specified as the N|Solid Console Server will provide the other addresses during handshake over the NSOLID_COMMAND channel.
NSOLID_GRPC-- The address for the gRPC protocol for bidirectional communication between the Agent and the Console Server. Default port: 50051 (N|Solid 6.1.0 and later)NSOLID_COMMAND-- The address for the "COMMAND" channel for bidirectional communication betwen the Agent and the Console Server. Default port: 9001NSOLID_DATA-- The address for one-shot data replies that contain smaller payloads. Default port: 9002NSOLID_BULK-- The address for large, multi-chunk streamed content such as Heap Snapshots or CPU Profies. Default port: 9003
- Environment
- package.json
- JavaScript API
You can use either the gRPC or ZeroMQ protocol to communicate with the N|Solid Console Server.
To connect to the N|Solid Console Server using the gRPC protocol (N|Solid 6.1.0 and later):
$ NSOLID_GRPC='localhost:50051' nsolid index.js
To connect to the N|Solid Console Server using the ZeroMQ protocol:
$ NSOLID_COMMAND='localhost:9001' nsolid index.js
You can use either the gRPC or ZeroMQ protocol to communicate with the N|Solid Console Server.
To connect to the N|Solid Console Server using the gRPC protocol (N|Solid 6.1.0 and later):
{
  "name": "example",
  "version": "0.0.0",
  "description": "N|Solid Configuration Example",
  "main": "index.js",
  "nsolid": {
    "grpc": "localhost:50051"
  },
  "dependencies": {
    ...
  }
}
To connect to the N|Solid Console Server using the ZeroMQ protocol:
{
  "name": "example",
  "version": "0.0.0",
  "description": "N|Solid Configuration Example",
  "main": "index.js",
  "nsolid": {
    "command": "localhost:9001"
  },
  "dependencies": {
    ...
  }
}
You can use either the gRPC or ZeroMQ protocol to communicate with the N|Solid Console Server.
To connect to the N|Solid Console Server using the gRPC protocol (N|Solid 6.1.0 and later):
nsolid.start({
  appname: 'example',
  appVersion: '0.0.0',
  grpc: 'localhost:50051'
})
To connect to the N|Solid Console Server using the ZeroMQ protocol:
nsolid.start({
  appname: 'example',
  appVersion: '0.0.0',
  command: 'localhost:9001'
})
Connecting to an OpenTelemetry endpoint
There are three key configuration variables necessary to fully enable OpenTelemetry.
NSOLID_TRACING_ENABLED
Tracing is not enabled by default. To do so at startup, this flag must be set to a true value. Tracing can be enabled and disabled during the life of the process remotely in the N|Solid Pro UI.
- Environment
- package.json
- JavaScript API
- N|Solid Pro UI
Environment:
NSOLID_TRACING_ENABLED=1
{
  "name": "example",
  "version": "0.0.0",
  "description": "N|Solid Configuration Example",
  "main": "index.js",
  "nsolid": {
    "command": "localhost:9001",
    "tracingEnabled": true,
  },
  "dependencies": {
    ...
  }
}
nsolid.start({
  appname: 'example',
  appVersion: '0.0.0',
  command: 'localhost:9001',
  tracingEnabled: true
})
There are a few ways to enable Tracing within the N|Solid UI.
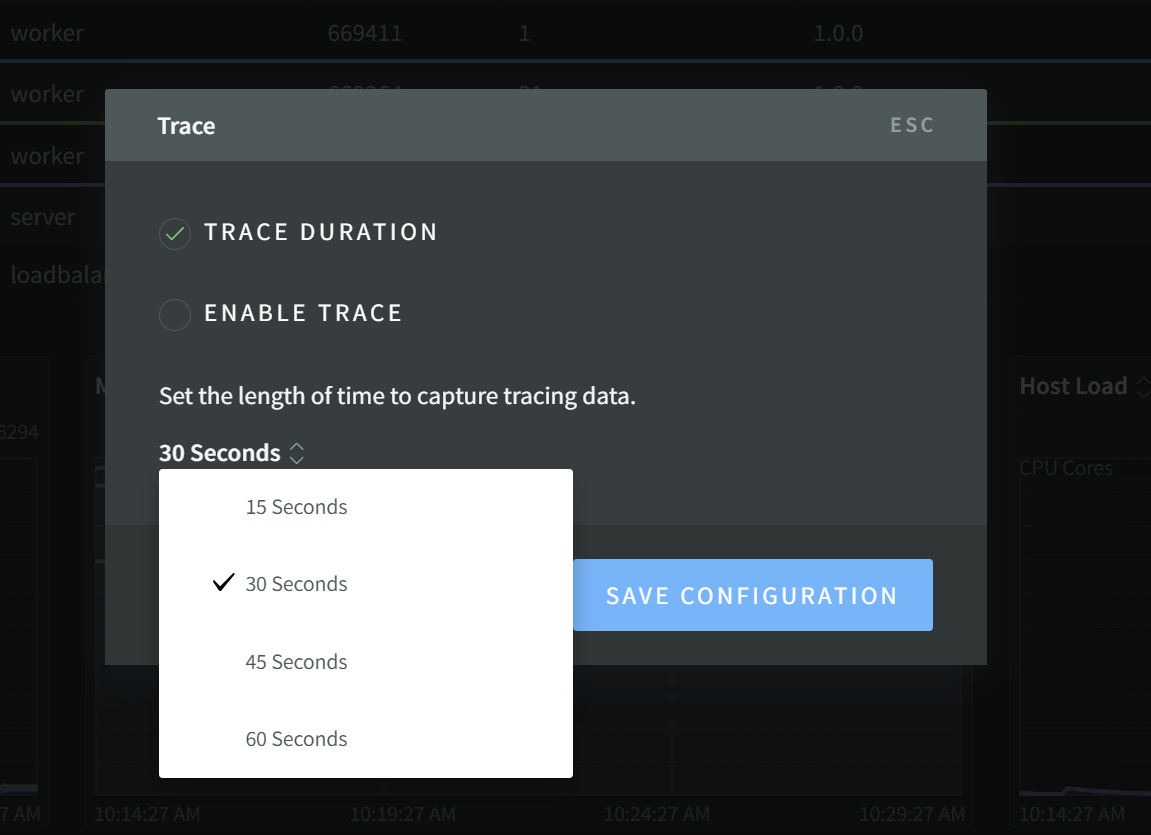
The tracing icon in the N|Solid UI is a button that can be used to open a modal that can either start a timed window of tracing or to toggle tracing on or off.
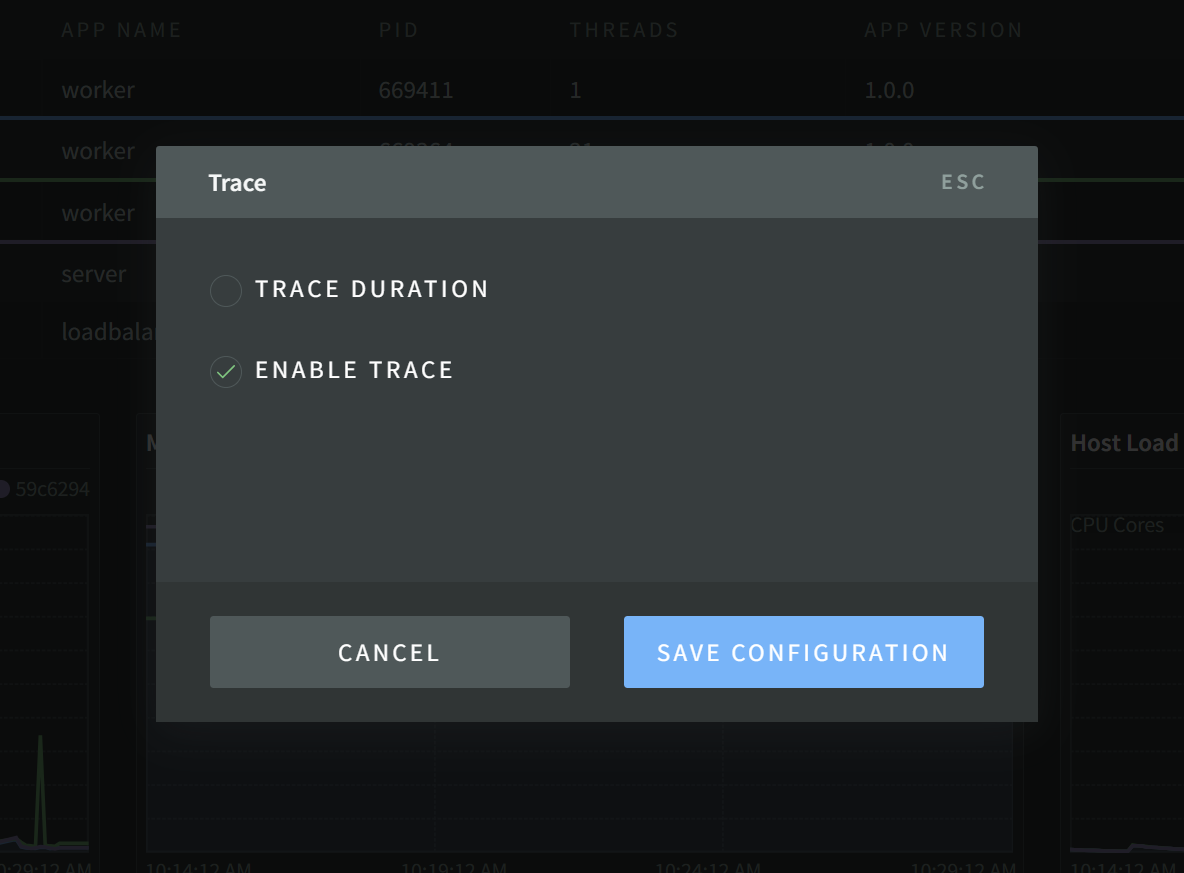
Tracing button in the List vew:

Tracing button in the single process view:
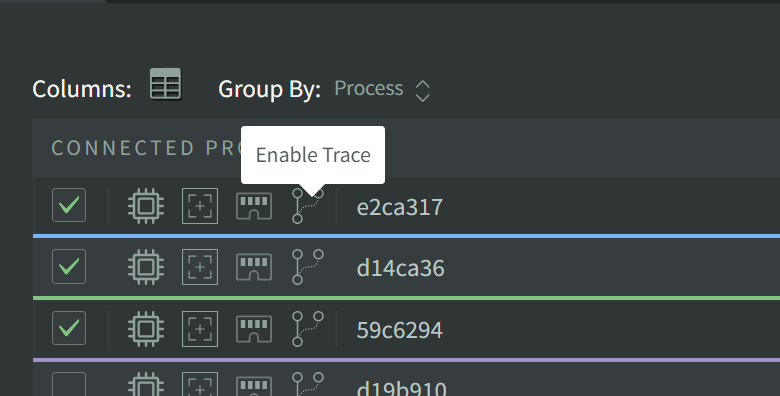
The icon can also be green, indicating that tracing is already enabled for this process, even if tracing was enabled via another means.
With tracing enabled, if the N|Solid Agent has an N|Solid Console connection, it will automatically start sending trace data.
Even if you aren't connecting to a N|Solid Console Server, you must enable tracing to send OTLP data to other configured endpoints.
NSOLID_OTLP and NSOLID_OTLP_CONFIG
To configure additional endpoints, the NSOLID_OTLP and NSOLID_OTLP_CONFIG are used to specify where and how to send the traces.
NSOLID_OTLP defines the type of endpoint we're exporting the traces to. Current options are:
datadogdynatracenewrelicotlp
NSOLID_OTLP_CONFIG defines the configuration for the type of endpoint selected in NSOLID_OTLP. This table provides examples of the configuration object for each type of endpoint:
| Endpoint Type | Keys | Format |
|---|---|---|
datadog | zone, key, url | { zone: 'us' | 'eu', key: 'your_datadog_key', url: 'otlp_endpoint_url' } |
dynatrace | site, token | { site: 'you_dynatrace_size', token: 'your_dynatrace' } |
newrelic | zone, key | { zone: 'us' | 'eu', key: 'your_datadog_key' } |
otlp | url, protocol | { url: 'otlp_endpoint_url', protocol: 'http' | 'grpc' } |
- Environment
- package.json
- JavaScript API
Environment:
NSOLID_TRACING_ENABLED=1 NSOLID_OTLP=dynatrace NSOLID_OTLP_CONFIG='{"site":"my_site","token":"my_token"}'
{
  "name": "example",
  "version": "0.0.0",
  "description": "N|Solid Configuration Example",
  "main": "index.js",
  "nsolid": {
    "command": "localhost:9001",
    "tracingEnabled": true,
    "otlp": "otlp",
    "otlpConfig": {"url": "localhost", "protocol": "http"}
  },
  "dependencies": {
    ...
  }
}
nsolid.start({
  appname: 'example',
  appVersion: '0.0.0',
  command: 'localhost:9001',
  tracingEnabled: true,
  otlp: 'datadog'
  otlpConfig: { zone: 'eu', key: '...', url: '...' }
})
Connecting to a STATSD endpoint
NSOLID_STATSD
To send N|Solid metrics to a StatsD endpoint, all that is required is the url configured as NSOLID_STATSD
- Environment
- package.json
- JavaScript API
- N|Solid UI
Environment:
NSOLID_STATSD=localhost
{
  "name": "example",
  "version": "0.0.0",
  "description": "N|Solid Configuration Example",
  "main": "index.js",
  "nsolid": {
    "command": "localhost:9001",
    "statsd": "localhost:9999"
  },
  "dependencies": {
    ...
  }
}
nsolid.start({
  appname: 'example',
  appVersion: '0.0.0',
  command: 'localhost:9001',
  statsd: 'localhost:9999'
})
The Configuration modal can be used to set the StatsD information. To access the Configuration modal, click the 'Process Configuration' link when looking at a single process:

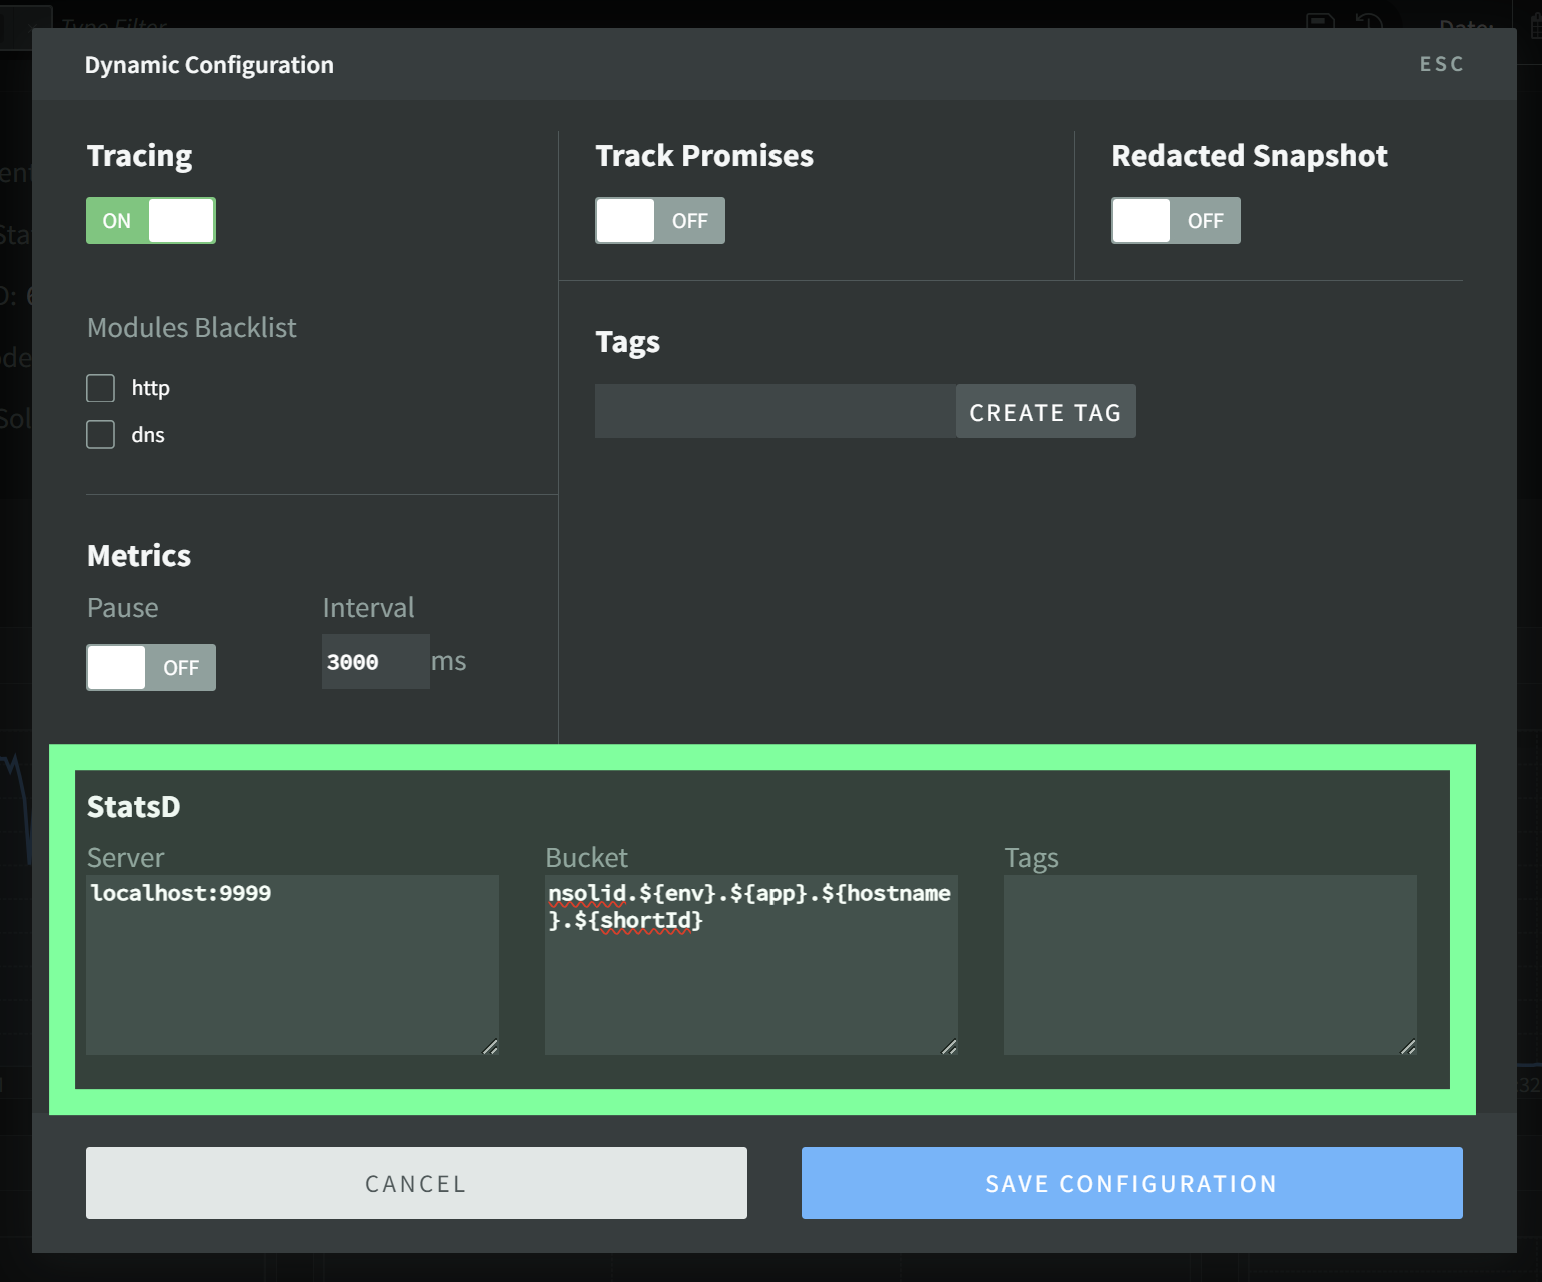
From this modal you can view and change the configuration for NSOLID_STATSD, NSOLID_STATSD_BUCKET, and NSOLID_STATSD_TAGS:
StatsD metrics are reported using "buckets". This format will depend somewhat on your reporting frontend and may require some experimentation.
By default, N|Solid creates bucket names prefixed with "nsolid.<env>.<app>.<hostname>.<shortId>.", followed by the name of the metric. In this string:
envis the value of theNSOLID_ENVenvironment variable if it exists, or the"env"property of the"nsolid"section in package.json if it exists. Defaults to"prod"if not otherwise supplied.appis the value of theNSOLID_APPenvironment variable if it exists, or the"app"property of the"nsolid"section in package.json if it exists, or the"name"property in package.json if it exists, orprocess.titleif it has been set. Defaults to"untitled application"if not otherwise supplied.hostnameis the value of theNSOLID_HOSTNAMEenvironment variable if it exists, or the"hostname"property of the"nsolid"section in package.json if it exists. Otherwise, the value ofos.hostname()is used.shortIdis the first 7 characters of the random alphanumeric ID created by the N|Solid Agent at startup. This can be used to uniquely identify your processes. The full 40 character string is also available asidif required.
Your StatsD data, by default, will be formatted like so when sent to the collector:
nsolid.prod.myapp.nodehost.803bbd5.uptime:314.4|g
nsolid.prod.myapp.nodehost.803bbd5.rss:28401664|g
nsolid.prod.myapp.nodehost.803bbd5.heapTotal:8425472|g
nsolid.prod.myapp.nodehost.803bbd5.heapUsed:5342488|g
...
StatsD tags
Some backends, such as DataDog support "tags" for metric reporting.
By default, N|Solid does not append any tags to its metrics.
NSOLID_STATSD_BUCKET and NSOLID_STATSD_TAGS
To alter the default configuration for bucket and tag decorators for your StatsD data, you can use the NSOLID_STATSD_BUCKET and NSOLID_STATSD_TAGS variables.
Both NSOLID_STATSD_BUCKET and NSOLID_STATSD_TAGS support variable substitution for the keys listed in the table above. In the config string use ${template} literal style quoting to susbstitute those values.
For example: The default bucket prefix would be specified as follows: "nsolid.${env}.${app}.${hostname}.${shortId}".
Using the NSOLID_STATSD_TAGS environment variable, or the statsdTags property of the nsolid section in package.json, supply a string with the same variable substitution format as for the buckets above.
In addition to env, app, hostname, shortId and id variables, you can also make use of tags to insert the N|Solid tags that have been supplied for the process.
StatsD tags should be a comma-separated list of strings that your backend can decode. Refer to your statsd provider documentation to find out if tags are supported and what you should set them to.
- Environment
- package.json
- JavaScript API
- N|Solid Pro UI
Environment:
NSOLID_STATSD=localhost
{
  "name": "example",
  "version": "0.0.0",
  "description": "N|Solid Configuration Example",
  "main": "index.js",
  "nsolid": {
    "command": "localhost:9001",
    "statsd": "localhost:9999",
    "bucket": "COOLCORP.${env}.${app}.${hostname}.${shortId}"
  },
  "dependencies": {
    ...
  }
}
nsolid.start({
  appname: 'example',
  appVersion: '0.0.0',
  command: 'localhost:9001',
  statsd: 'localhost:9999',
  statsdBucket: 'COOLCORP.${shortId}',
  statsdTags: [host]
})
The Configuration modal can be used to set the StatsD information. To access the Configuration modal, click the 'Process Configuration' link when looking at a single process:

From this modal you can view and change the configuration for NSOLID_STATSD, NSOLID_STATSD_BUCKET, and NSOLID_STATSD_TAGS:

