Role Based Access Control
Enterprise and Advanced Tier Users can now utilize NodeSource’s central control nexus, accounts.nodesource.com to give and revoke Role Based Access Control permissions for the NSolid Console and accounts.nodesource.com.
Permissions are assigned via roles which are aggregate sets of feature-permissions; each of which can be fully customized to support your company’s workflow and access-control needs.
The system comes with a set of pre-made roles but is completely customizable allowing granular permission management. This includes adding permission-privileges to new and/or existing roles as well as the creation and deletion of existing roles.
HOW IT WORKS
NodeSource’s Role Based Access Control feature empowers Org Admins to create, define, manage and assign roles that provide access privileges to distinct user-actions and/or views in the NSolid Console and accounts.nodesource.com.
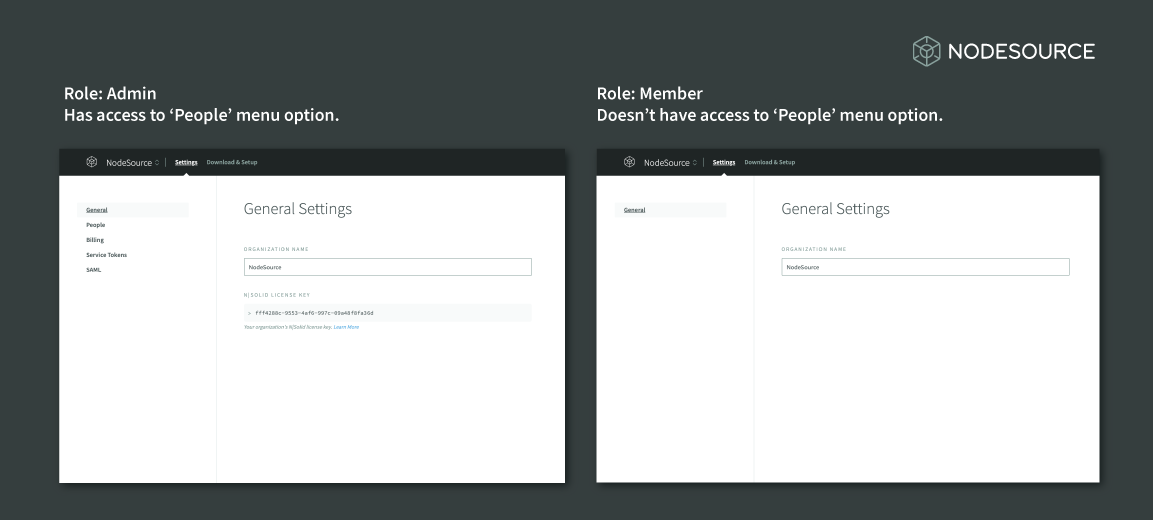
The following shows the NodeSource’s central control-nexus, accounts.nodesource.com, from the perspective of two different users:
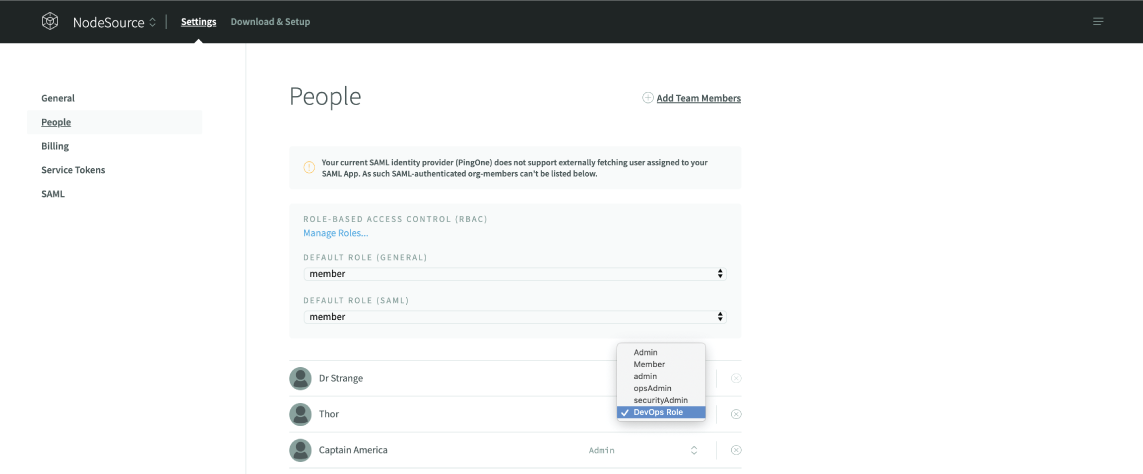
- The ‘Admin’ has access to the Organization’s ‘People’s’ Tab where they can invite team-members, define and assign RBAC roles.
- The ‘Member’ doesn’t have access to the ‘People’s Tab. To them the tab isn’t visible.
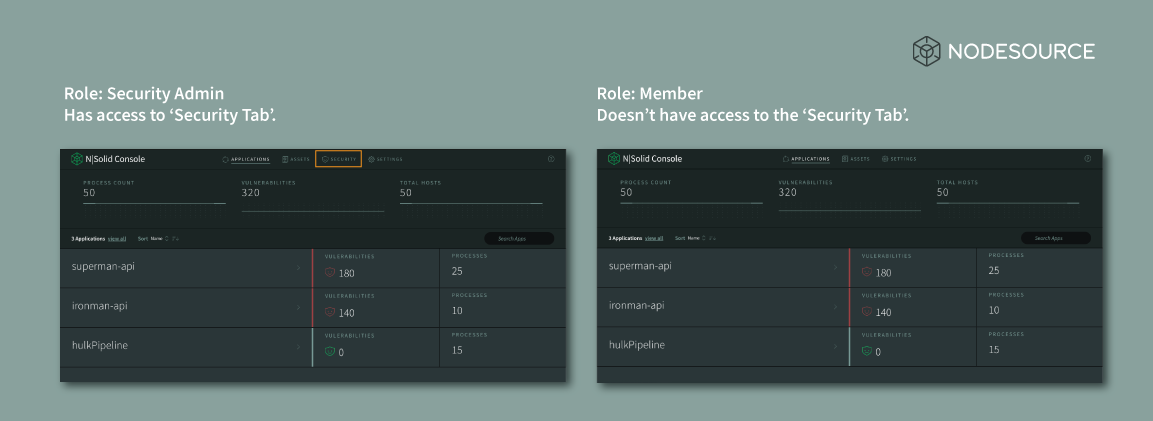
Similarly in the NSolid Console a ‘Security Admin’ will be granted access to the Console’s Security Tab, while a user with the ‘Member’ role won’t be allowed to access this option:
Default Roles
accounts.nodesource.com
-
To access your existing roles log into accounts.nodesource.com and select your organization from the org-selector in the top left corner:
-
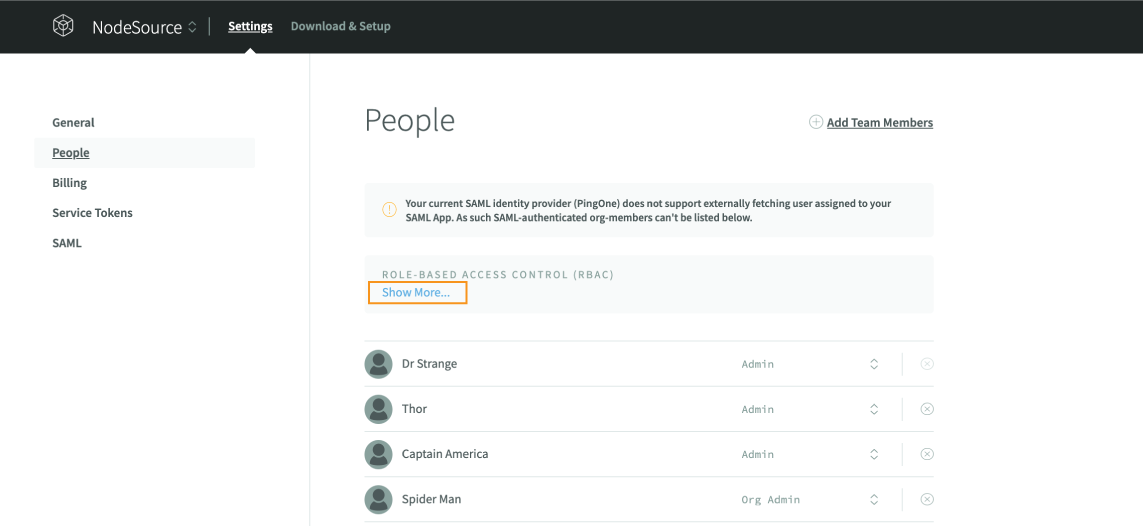
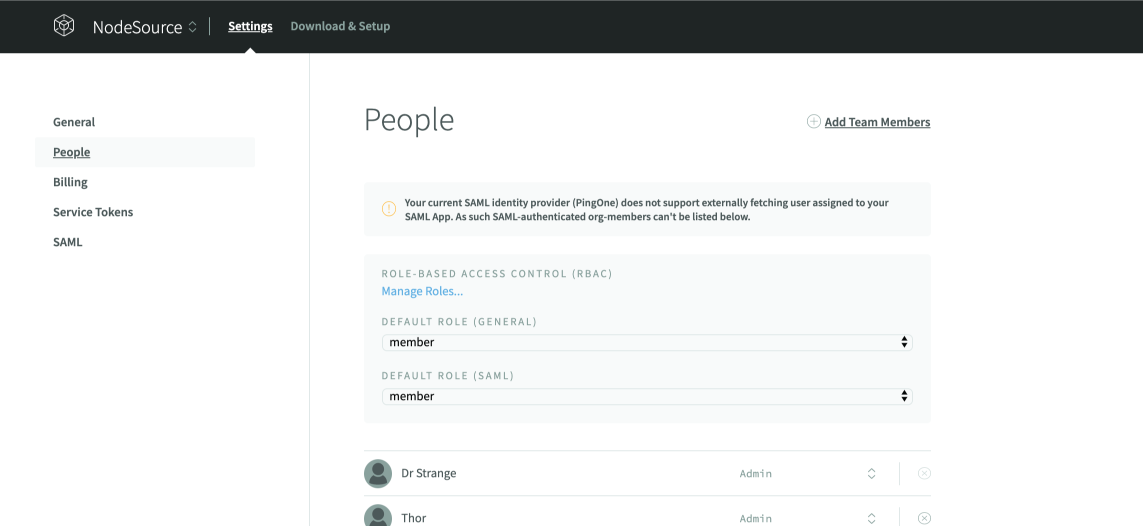
Visit Settings > People and select the Show More selector under Role Based Access Control (RBAC)
-
The expanded RBAC menu lets you configure default roles for new users joining the organization. This can be configured for for both invited users (Default role (General)) and team members who are joining via your organization's SAML configuration (Default Role (SAML)).
Pre-Made Roles & Modifying Roles via the Manage Role Configuration Dialog
NodeSource's accounts system comes with a set of pre-made roles but permits full customization of permissions per role as well as the creation and deletion of existing roles.
-
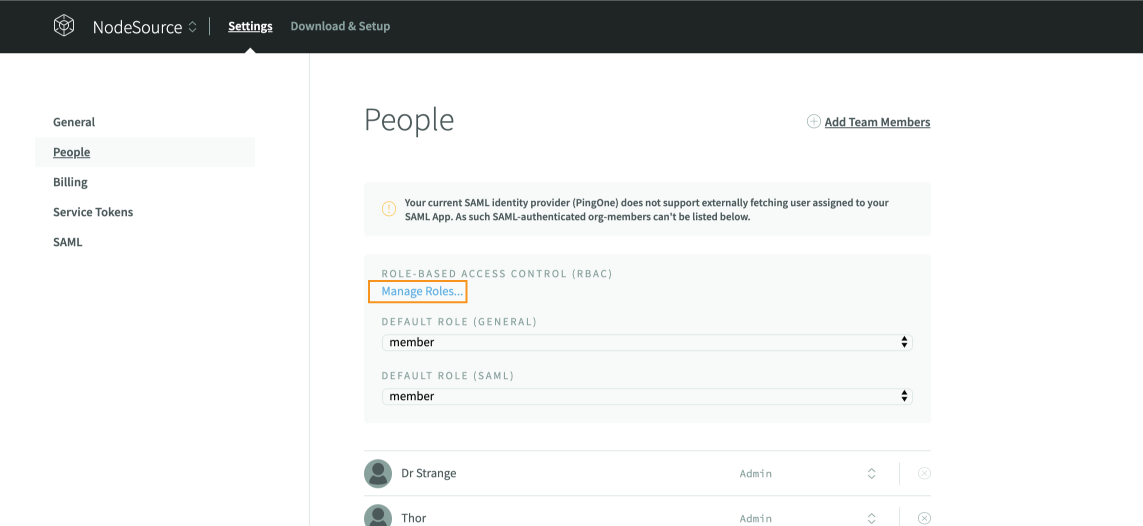
To access your existing roles navigate to your organizations Settings > People's RBAC Dialogu and expand it as mentioned above.
-
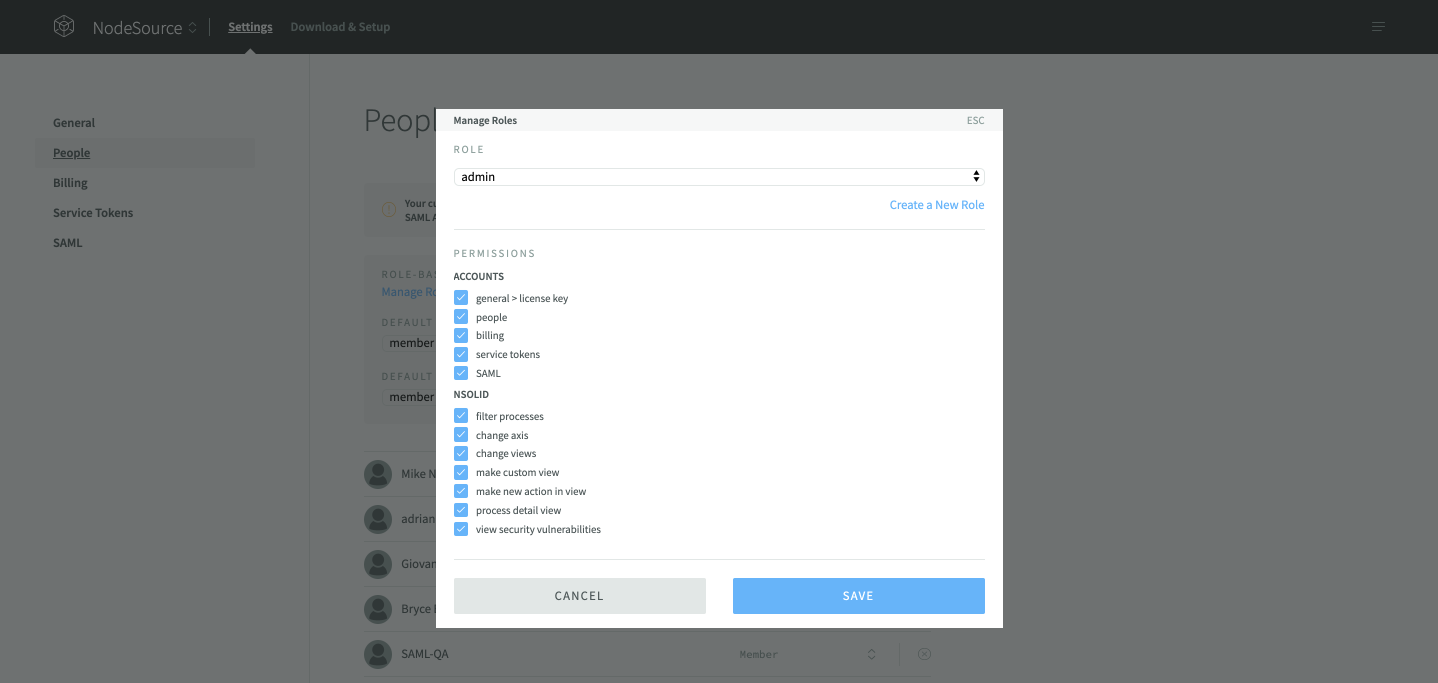
In the expanded RBAC window, click on the Manage Roles selector, this opens the Manage Role configuration dialog.
-
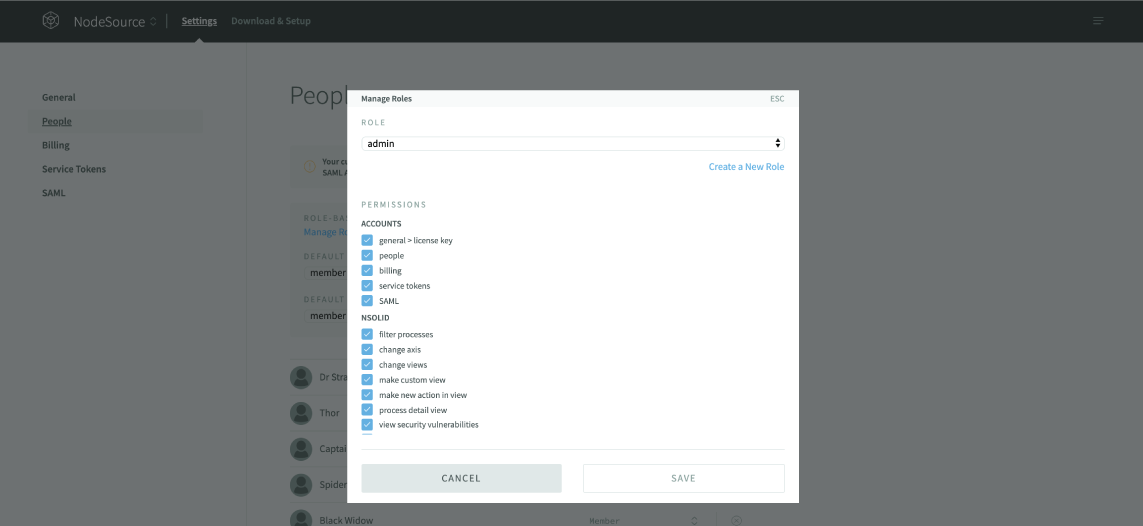
The Manage Role Configuration Dialog permits users to modify existing and create new roles. Each role is an aggregate sets of feature-permissions that can be modified by a user with permissions to access the organization's People's Tab.
-
Users whose role has accsess to the People's Tab are able to modify permission-sets for each role. We recommend this to be a priviledge that is resered to the organization's Admin and Super Admin roles.
Creating New Roles
-
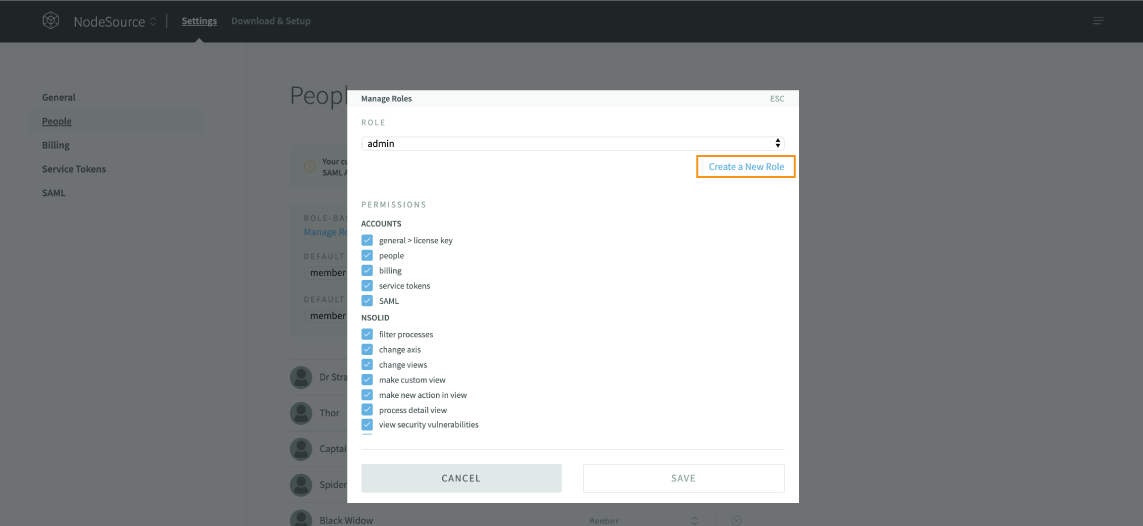
To create a new role, click on the 'Create a New Role' in the Manage Role Configuration Dialog
-
Name your role and select the permissions you would like this role to access. A detailed explanations for each permission is provided below.
Assigning Roles
Once saved a new and/or existing role can be assigned to users.
RBAC Available Permissions
The following permissions can be aggregated into new roles and/or added to existing roles:
accounts.nodesource.com:
| Permission Options | Read and Write Permissions |
|---|---|
| General>License Key | User can view org’s License Key in Settings>License Key |
| Billing | User can access the billing section |
| Service Token | User can create and invalidate new service tokens |
| SAML | User may add/ remove support for Federated Authentication via Okta, PingIdentity or One Login. |
| People Management | Users with this permission may: - Manage, invite or remove org members, - Invite or remove team-members, - Assign or change roles per team-member, - Set default roles for new team-members, - Manage roles, including creating new and augmenting existing roles by selecting a set of permissions for each role. |
NSolid Console - Security
| Permission Options | Read and Write Permissions |
|---|---|
| View Security Vulnerabilities | User can access the NSolid Console's Security Tab |
| Hide Security Vulnerabilities | User can hide security vulnerabilities on the Security Tab |
NSolid Console - Notifications
| Permission Options | Read and Write Permissions |
|---|---|
| Settings > Global Notifications | Access and modify Global Notifications in Settings |
| Make Custom View | Access, create, modify and/or delete threshold views that trigger Slack, MS Teams, Email or Webhook Notifications |
NSolid Console - Diagnostic Assets:
| Permission Options | Read and Write Permissions |
|---|---|
| Generate CPU Profiles | Create and Delete CPU Profiles |
| Generate Heap Snapshots | Create and Delete Heap Snapshots |
NSolid Console - Monitoring:
| Permission Options | Read and Write Permissions |
|---|---|
| Filter Processes | Set process and reporting filters |
| Change Axis | Change reporting axis |
| Make Custom View | Change, create and/or delete custom views |
| Process Detail View | Access process detail view for any given process |
Automated Actions:
| Permission Options | Read and Write Permissions |
|---|---|
| Make new Action in View | Set or remove automated actions that are triggered when a performance threshold is exceeded. These include taking a Heap Snapshot, CPU Profile and/or Slack, MS Teams, Webhook or Email Notification |
NSolid Console - Settings:
| Permission Options | Read and Write Permissions |
|---|---|
| Settings > General Settings | Access General Console Settings Including: Setting the Console URL, your NSolid Console License Key and Org Association and asset retention policies. |
| Settings > Global Notifications | Manage Global Notifications for when new security vulnerabilities are discovered, or when your applications experience one of the following global events: event loop blocked for longer than N milliseconds, a process died. |
| Settings > Saved Views | Modify and/or delete saved views |
| Settings > Integrations | Configure Slack, MS Teams and/or Webhook |
| Settings > Import/Export Settings | Import or export your configuration for saved views, integrations and global notifications |
