Configure SAML SSO with Okta, PingOne, and OneLogin
NodeSource Accounts supports SAML 2.0 single sign-on (SSO), so your organization can manage access to NodeSource Accounts and the N|Solid Console through an identity provider (IdP) such as Okta, PingOne (Ping Identity), or OneLogin. This page walks through the setup for each provider and explains how to require SAML for all members.
SAML (Security Assertion Markup Language) is an open standard for exchanging authentication and authorization data between an identity provider and a service provider.
Requirements
To set up SAML SSO, you need:
- An enterprise subscription in NodeSource Accounts.
- Administrator privileges in NodeSource Accounts.
- Administrator privileges in your identity provider.
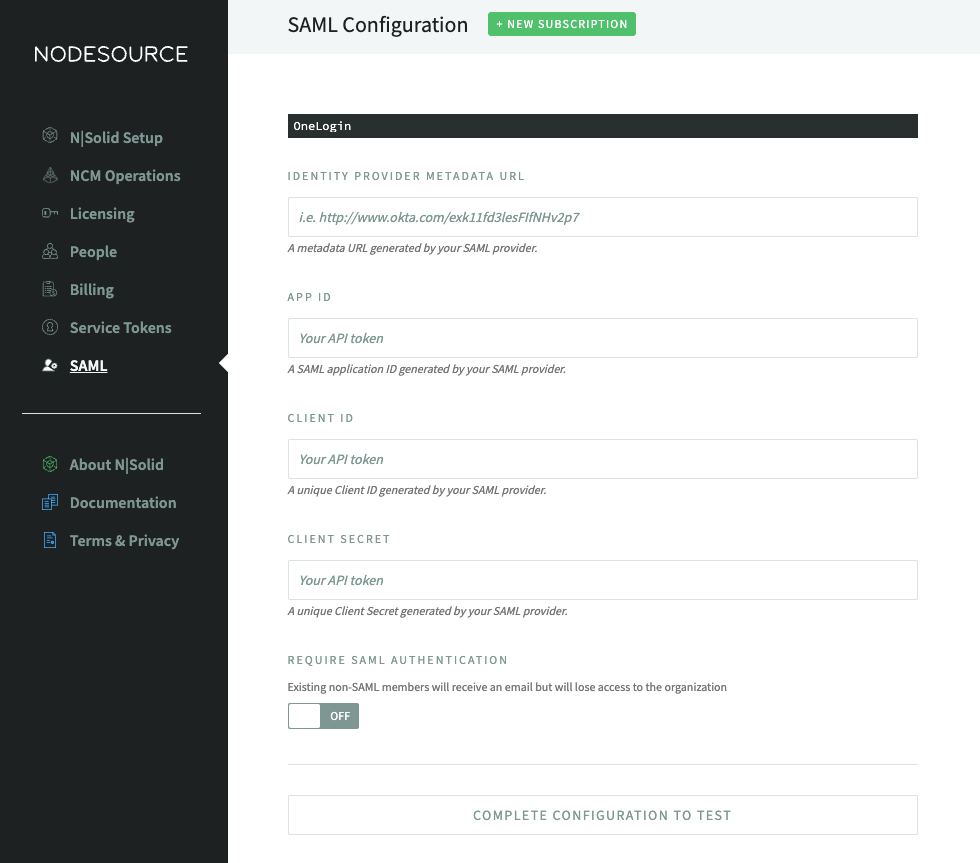
In NodeSource Accounts, SAML is configured in the SAML item of the left navigation. Choose your provider from the dropdown: OKTA, PingOne(Ping Identity), or OneLogin.
Set up SAML with Okta
-
Sign in to your Okta account as an administrator.
-
Go to
Admin Dashboard > Applications > Add Application. -
Click
Create New Appand chooseSAML 2.0as the sign-on method.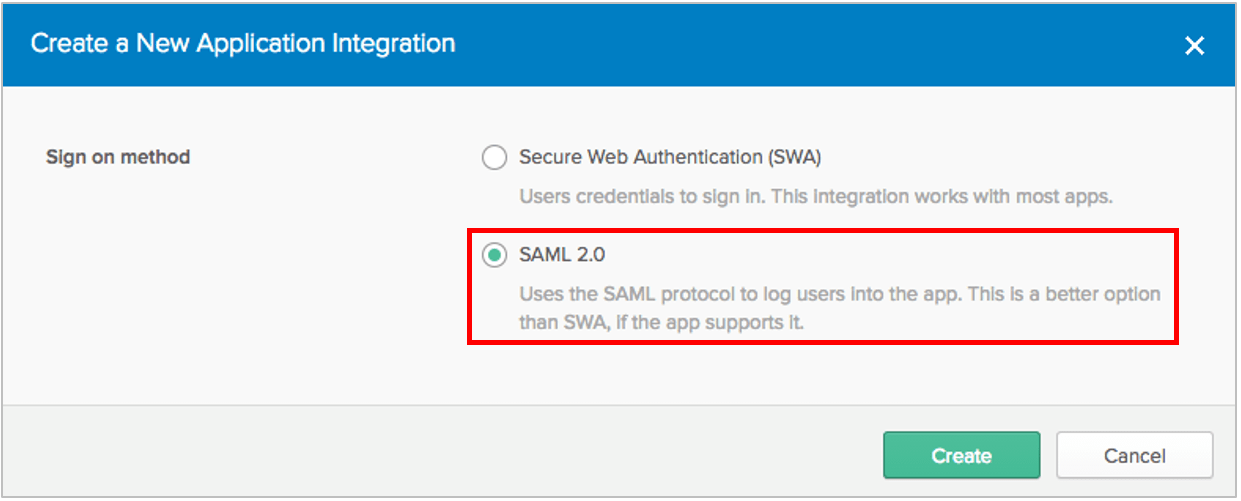
-
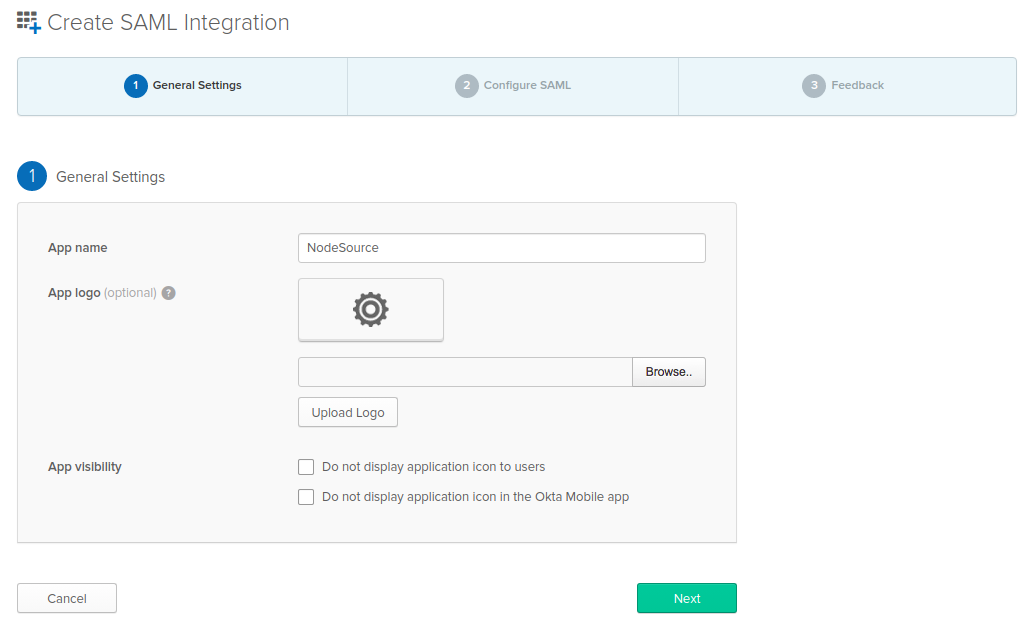
Enter the general settings for the application, including the app name and, optionally, an app logo.
-
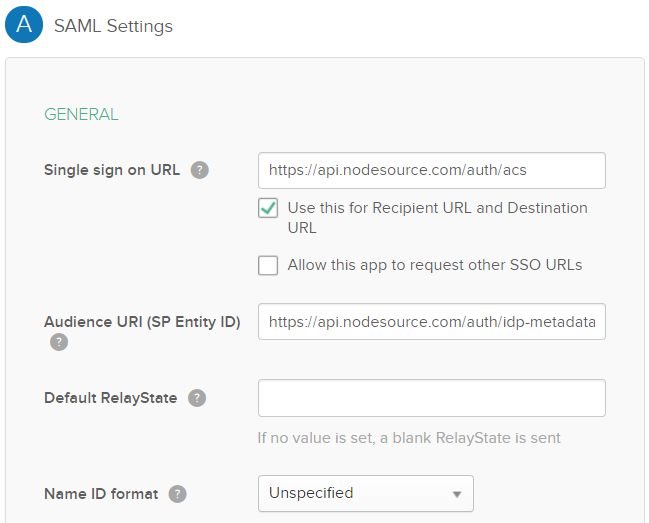
Enter the SAML settings:
Single sign on URL:https://api.nodesource.com/accounts/auth/acsAudience URL:https://api.nodesource.com/accounts/auth/idp-metadataName ID format:unspecified
-
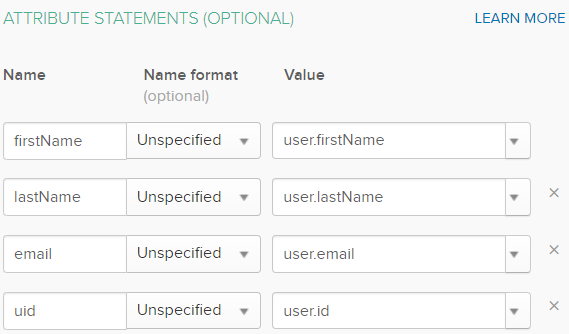
Enter the attribute statements shown below. They map attributes between Okta and NodeSource.
-
Create a new API token (
Security > API > Tokens > Create Token).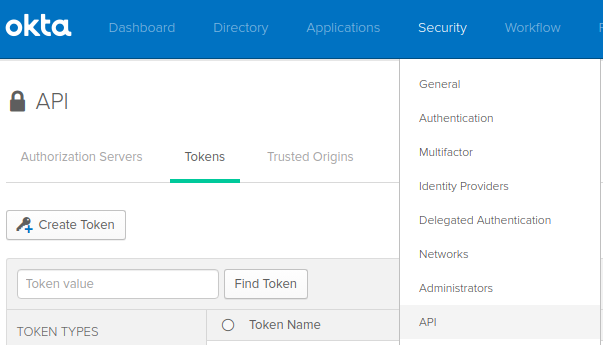
-
In
Settings > Features, enable Event Hooks so SAML webhooks can be used.
-
In your SAML app, go to
Sign On > Settingsand copy the link address of the Identity Provider metadata.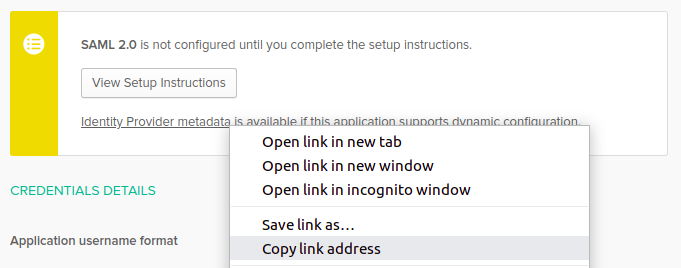
-
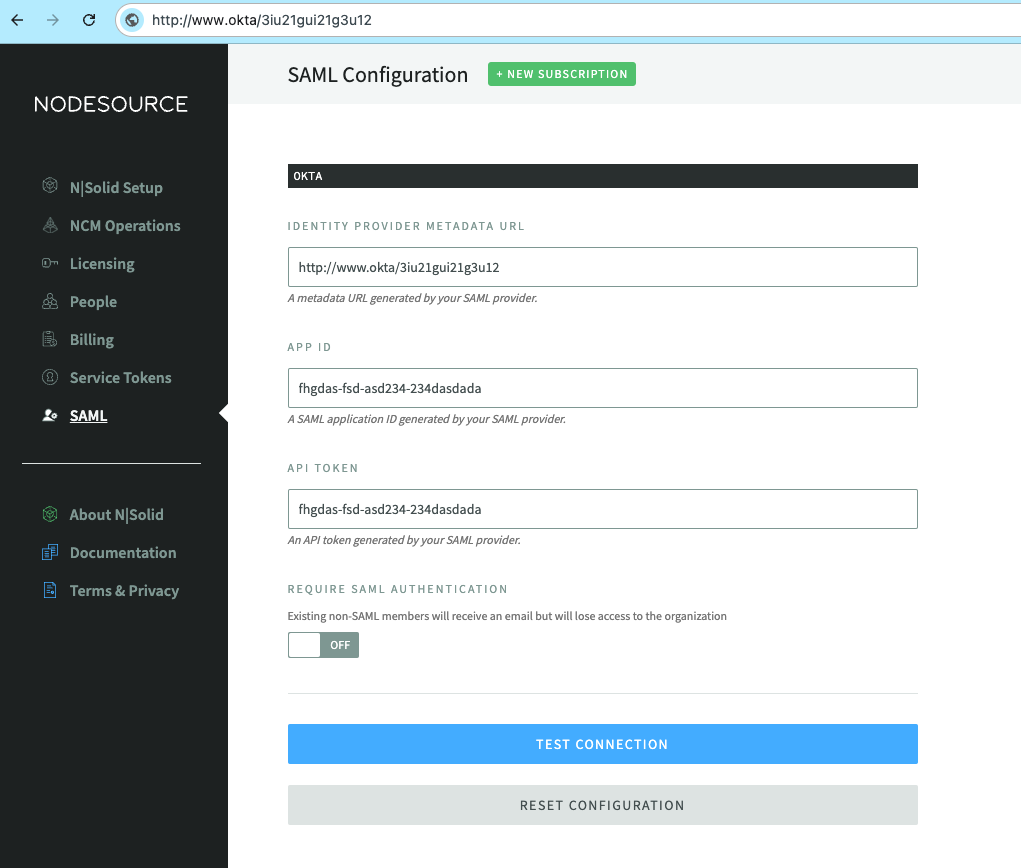
In the SAML settings in NodeSource Accounts, enter the values from the previous steps:
- Identity Provider Metadata URL: the Identity Provider metadata link from
Sign On > Settings. - App ID: the ID in your Okta SAML app's admin URL. In a URL such as
https://<your-okta-domain>/admin/app/<app-name>/instance/<app-id>/, the App ID is the string afterinstance/. - API Token: the API token you created in Okta.
- Identity Provider Metadata URL: the Identity Provider metadata link from
-
Click Test Connection to test the single sign-on connection.
Use N|Solid with Okta-based SAML
After your organization turns on the Okta integration, each user must sign in at accounts.nodesource.com once to accept the NodeSource terms and conditions. After that, users can open the N|Solid Console directly with their SAML SSO credentials. To open NodeSource apps from your Okta portal, see SAML integration with Okta.
Set up SAML with PingOne (Ping Identity)
-
Sign in to your PingOne account as an administrator.
-
Go to
Applications. -
On the
My Applicationstab, clickAdd Applicationsand chooseNew SAML Application. IfNew SAML Applicationis disabled, connect to an identity repository first. See the PingOne documentation. -
Enter the application details, including
Application NameandApplication Description.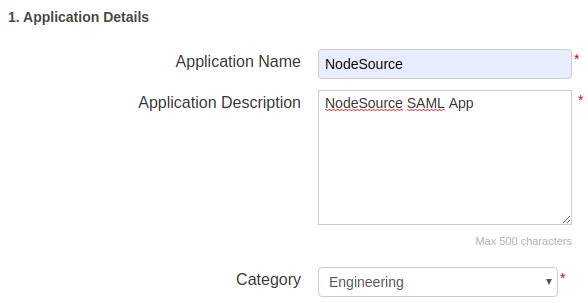
-
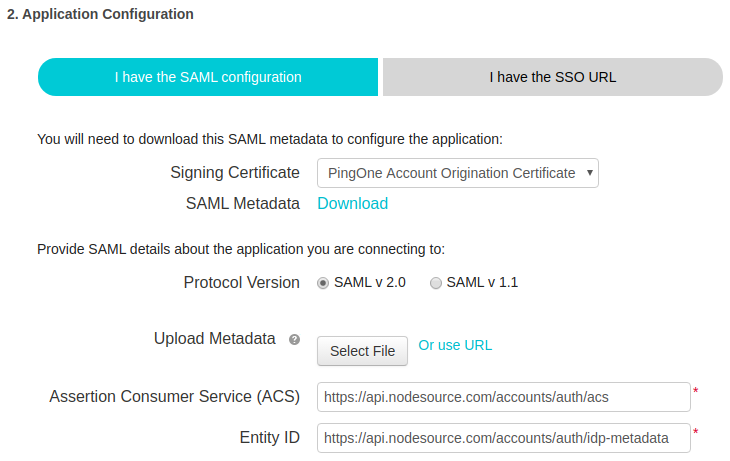
Enter the SAML settings:
Assertion Consumer Service (ACS):https://api.nodesource.com/accounts/auth/acsEntity ID:https://api.nodesource.com/accounts/auth/idp-metadata
-
Map the application provider (AP) attributes as shown below. Your
orgIdis shown as ORG ID on the SAML page in NodeSource Accounts.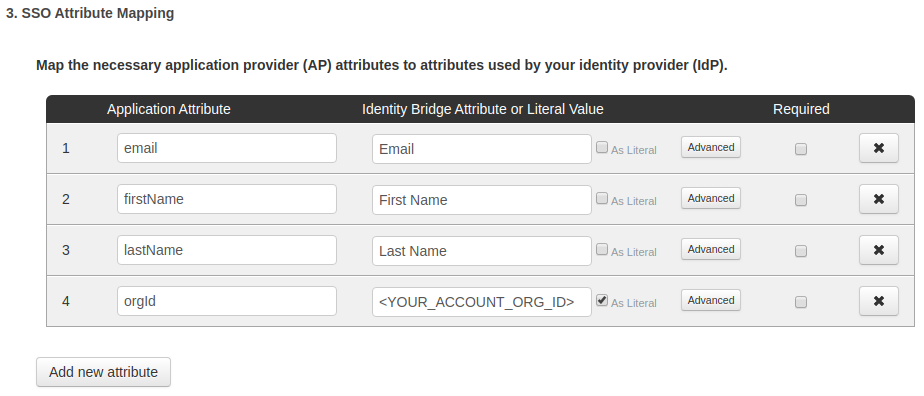
-
Select the user groups that should have access to this application. Members of these groups can sign in to the application with SSO and see it on their personal dock.
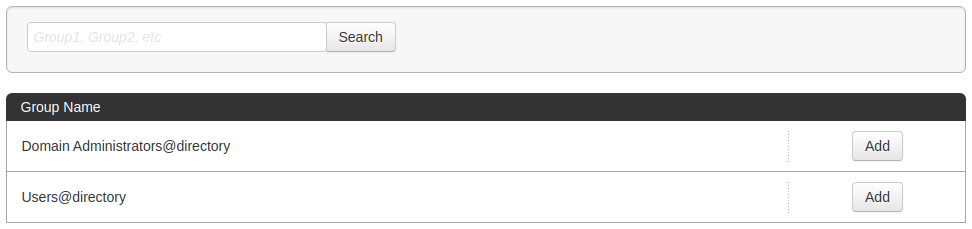
-
Review the setup and click
Finish. -
On the SAML page in NodeSource Accounts, enter the values from the previous steps:
- Identity Provider Metadata: your identity provider metadata (XML).
- SSO URL: the single sign-on (SSO) URL of your SAML app.
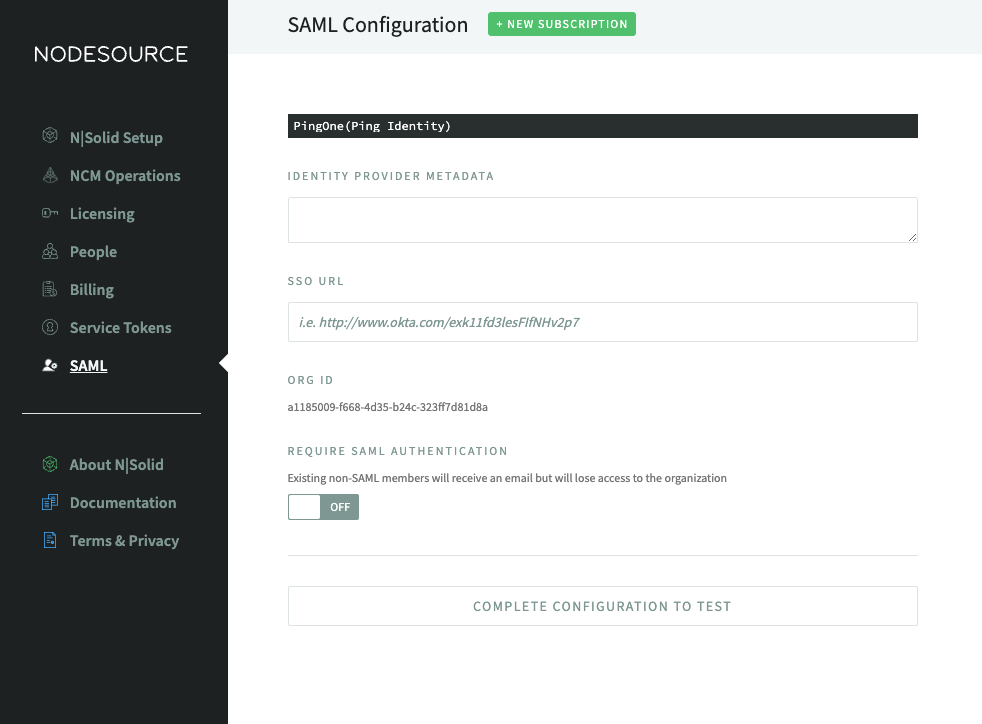
-
Click Test Connection to test the single sign-on connection.
Set up SAML with OneLogin
-
If you don't have a OneLogin account, create one at developers.onelogin.com.
-
Sign in as your organization's administrator and go to
Apps > Company Apps, then clickAdd App. -
Enter
SAMLin the search box and selectSAML Test Connector (Advanced).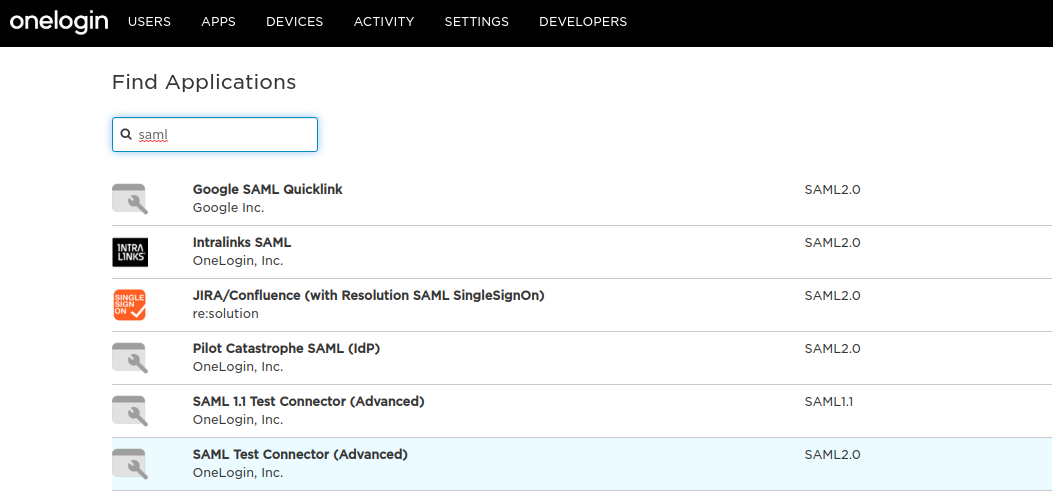
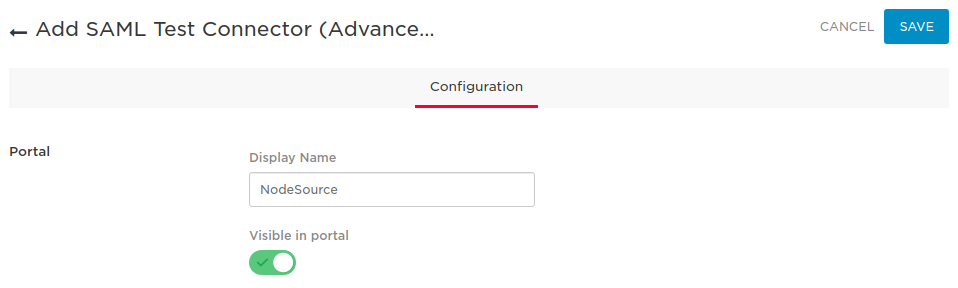
-
In the
Application Detailssection, apply the configuration shown below.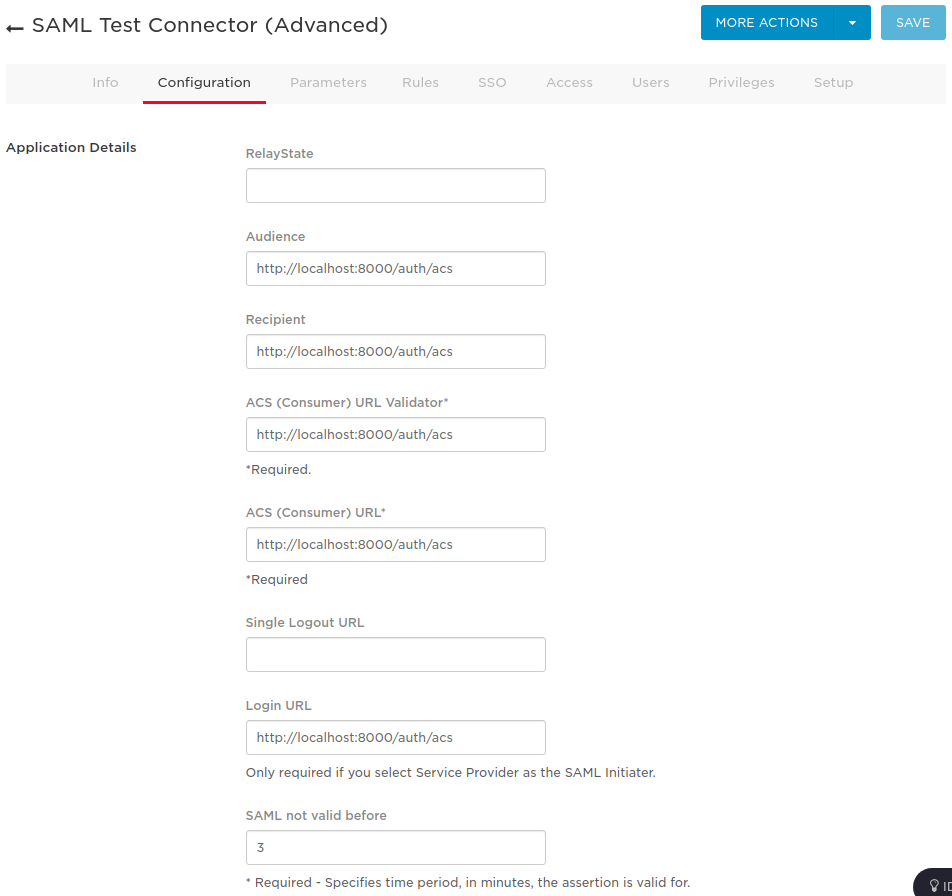
-
Set the
Parametersas follows: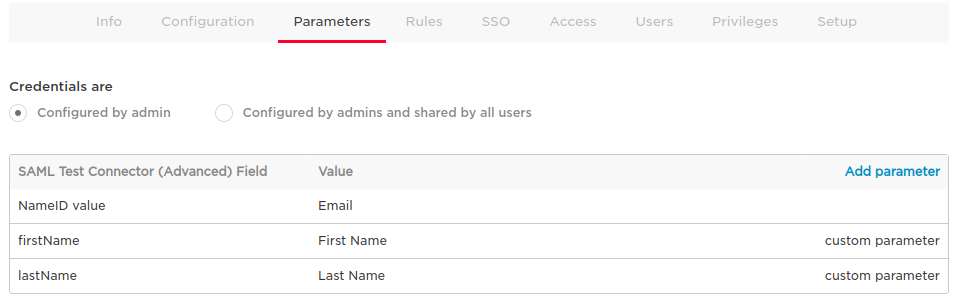
-
On the
SSOtab, clickView Detailsto get your X.509 certificate.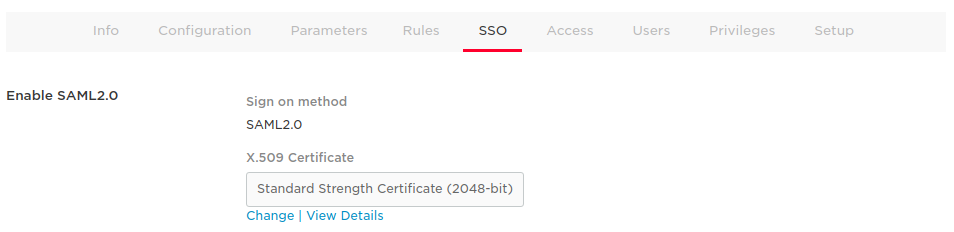
-
To get your IdP metadata URL, click
MORE ACTIONS, right-clickSAML Metadata, and copy the link address.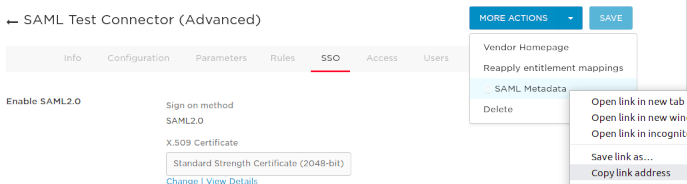
-
Select
DEVELOPERS > API Credentialsto create API credentials.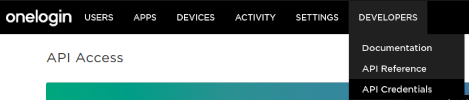
-
Click
New Credential, selectManage All, and save.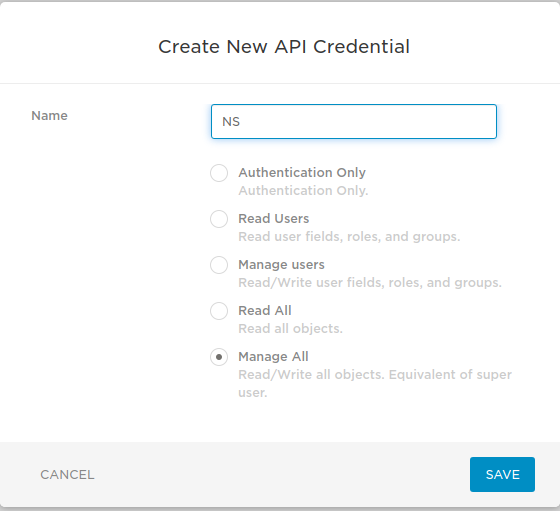
-
Your API credentials (
CLIENT SECRETandCLIENT ID) are created.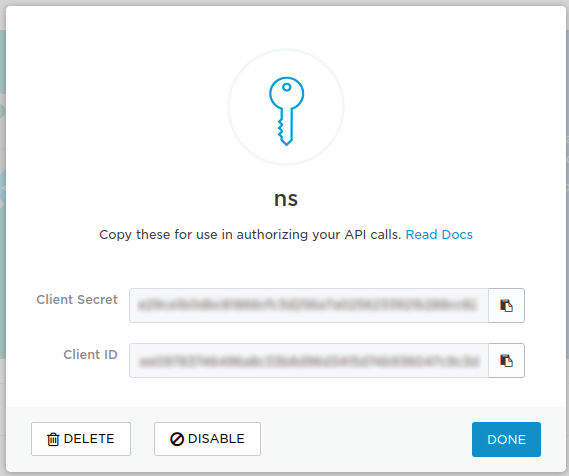
-
In accounts.nodesource.com, go to the SAML page.
-
Paste the metadata URL from step 7 into Identity Provider Metadata URL.
-
Enter the App ID. In your OneLogin SAML app's URL, such as
https://<your-subdomain>.onelogin.com/apps/<app-id>/, the App ID is the number afterapps/. -
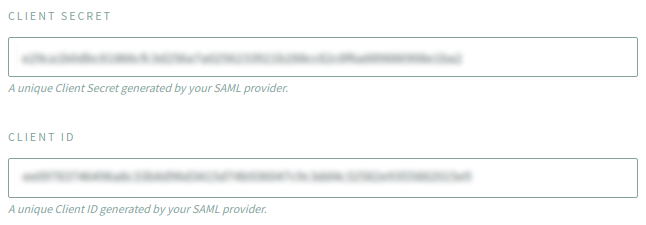
Enter the Client ID and Client Secret you generated in step 10 in their fields, as shown below.
Require SAML authentication
You can require SAML authentication for your organization, so that only users who can sign in with your organization's Okta, PingOne, or OneLogin credentials have access. Members you invited without SAML (such as third-party contractors) receive an email and lose access to the organization. Use this to restrict access to your NodeSource organization, accounts.nodesource.com, and the N|Solid Console.
To turn it on, open the SAML page in accounts.nodesource.com and turn on the Require Saml Authentication toggle.